Another year is coming to a end for Paintway but we have yet again scoured the internet and we are feeling really inspired and share some predicted colour trends for homes in Australia 🇦🇺 in 2025.
1. Earthy Tones
Warm Neutrals: Shades like terracotta, warm taupes, and soft browns are becoming increasingly popular as they create a cozy and inviting atmosphere.
Natural Greens: Colors inspired by nature, such as sage green or olive tones, promote tranquility and a connection to the outdoors.
2. Bold Accents
Vibrant Hues: Rich colours like deep blues (navy or cobalt), emerald greens, or spicy reds may be used as accent walls to add drama to spaces
Statement Colours: Bright yellows or oranges could emerge as playful accent colors that bring energy into home environments.
3. Soft Pastels
Muted Shades: Soft pastels such as blush pinks, light lavenders, and pale blues offer a refreshing take on traditional lighter shades while adding warmth.
Vintage Vibes: These colors can evoke nostalgia while fitting seamlessly into modern designs.
4. Monochromatic Schemes
Using varying shades of one color can create depth without overwhelming the senses—think layers of greys or subtle variations of blue.
5. Textured Finishes
Beyond just color selection, finishes that incorporate texture (like matte vs glossy) may gain popularity to add interest to surfaces without relying solely on dramatic hues.
6. Sustainable Choices
Eco-friendly paints with natural pigments may influence both colour choice and product selection among environmentally conscious homeowners.
What will be your choice or what would you like to see in Colours in 2025?
Let us know!
Christmas 2023 🌲
Have you completed your Christmas shopping? Paintway have been “wrapping up” (Pardon the Pun? hehe) all of our Christmas gift shopping over the past week, but I still have a few gifts left on my list. We have been so busy this month, it will feel great to have our shopping and gifts all set to go so we are ready to relax and enjoy time with family and friends.
Paintway would like to wish you all a very Merry Christmas 🎄 and would like to take the opportunity to thank you all so much for your business in 2023.
Thank you again for your Support in 2023!
Merry Christmas Toowoomba 🤶🏻 – James + Melissa
Housepainters Toowoomba
Call Paintway Today 1800 937 724
House painting is a process that involves preparing the surfaces of a house, applying paint, and then allowing it to dry. It’s a great way to improve the appearance of your home, protect it from the elements, and increase its value. Here are some key points to consider:
Preparation: This is a crucial step that involves cleaning the surfaces, scraping off old paint, and repairing any damages. It’s important to ensure that the surfaces are smooth and free of dirt, grease, and loose paint for the new paint to adhere properly.
Choosing the Right Paint: The type of paint you choose depends on the surface you’re painting and the look you want to achieve. There are different types of paint for different surfaces, and they come in various finishes like matte, satin, semi-gloss, and gloss.
Painting Techniques: There are various techniques for applying paint, such as rolling, brushing, and spraying. The technique you choose can affect the finish and the time it takes to complete the project.
Safety: Painting can involve working at heights and using chemicals, so it’s important to take safety precautions. This includes using a sturdy ladder, wearing protective clothing, and ensuring good ventilation.
Clean Up: After the painting is done, it’s important to clean up properly. This includes disposing of used paint cans and cleaning brushes and rollers.
There are alot of “non qualified Painters” Ensure your painter is Licensed (they must be to complete any work over $3300) Fully Insured and Hold the correct Qualifications.
Do you have a problem with flaky or cracked ceilings? Read on…..
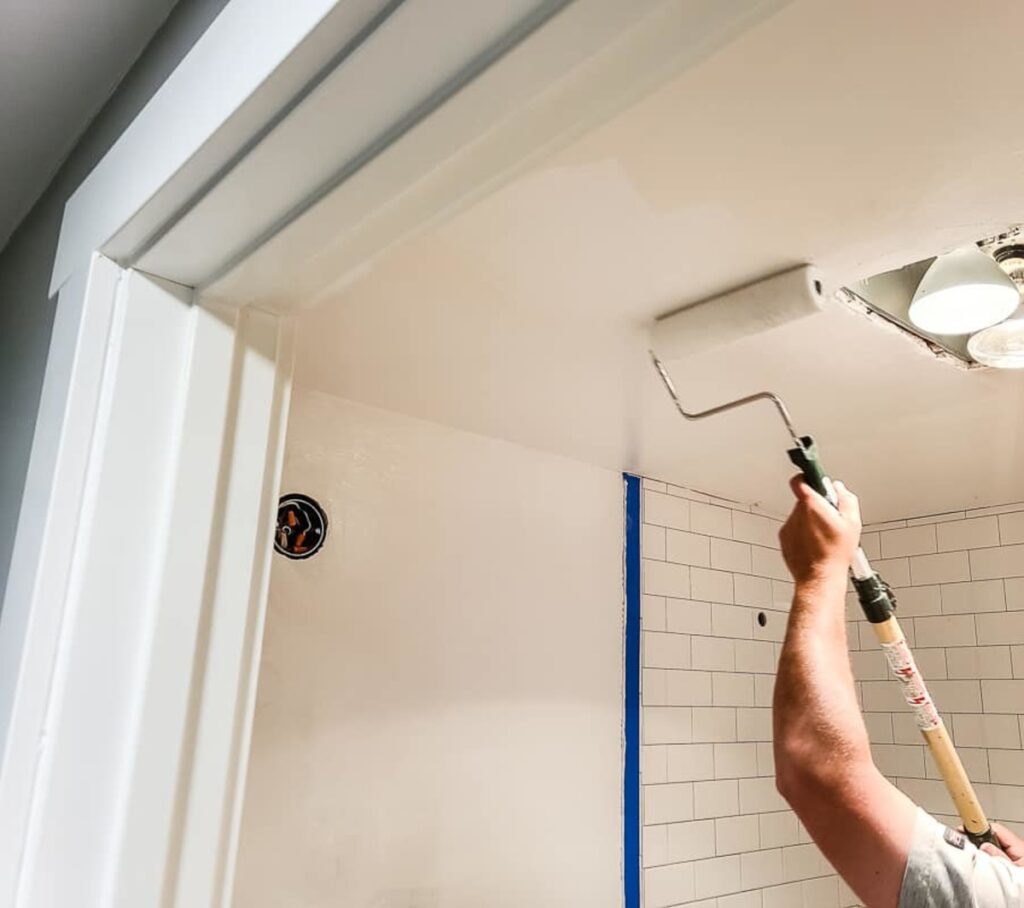
Problem Ceilings? (Peeling and Flaking Paint)
The common theme in the above reasons for problem ceilings is PREPARATION, wrong application and the ceilings history. Due to these reasons it is hard for the painting of a ceiling to be done at time. However, no matter how much preparation occurs if the history of the ceiling is problematic it is difficult to treat with a simple paint application.
Movement happens with all homes every 10 years or so…causing joins and cracks to also appear.
The most common problem area when it comes to painting is the ceiling. Especially in Bathrooms because of Moisture! Or where we are based here in Toowoomba in the Mountains there can be months of high moisture from being in the Clouds.
There are several problems that can occur on a ceiling to categorise it as a problem area:
Calcimine Paint
Fibrous plaster ceilings were originally being painted with calcimine paint. Calcimine paint came in powdered form. It was mixed with water then applied to the ceiling. Once it dried by the water evaporating it left a coat of pigment powder on the surface of the ceiling. Years later the ceiling would have been recoated using a flat plastic paint which resulted in the calcimine pigments and powders sucking all the binders out of the new plastic paint making them unstable. Over the years with extra coats being applied to the surface creating extra pressure as well as gravity doing its job causes the paint to flake.
Incorrect application
In the early 80s where gyprock homes were being built to price and with little knowledge of paints the incorrect application was being used. Painters were applying flat paints straight onto bare gyprock and therefore, the paint was not soaking in like a primer would usually do. This application process becomes unstable over the years as well as more coats being applied over time creating more pressure on the surface and gravity doing its job the result is a problem ceiling which peels and flakes.
Moisture
One of the more common issues with problem ceilings is moisture. There are several reasons why moisture occurs. Moisture from storm damage can release the coating from any ceiling surface causing peeling or blistering paint. Also wet areas in the house such as the kitchen, laundry and bathroom can create moisture. For example in a bathroom with lack of ventilation, steam damage can occur to the coating causing it to flake and peel. Using paint with a higher sheen level may help reduce water absorption which accelerates peeling ceilings.
Style of home
Queensland style homes most commonly have VJ timber ceilings. When flaking occurs on these types of ceilings it is usually due to new acrylic paint being applied over old enamel paint. This occurs because acrylic paint is flexible by nature and the enamel coating is rigid. Therefore over time due to changes in temperature the different paint properties work against each other resulting in the top layer delaminating. To solve this issue the acrylic coating needs to be completely removed followed by using a general purpose undercoat to stabilise the surface before recoating.
Autumn has Arrived 2023
Fashion and homewares trends come and go, and so do house paint colours. Thankfully, it’s almost as easy to refresh your walls as it is your wardrobe (skinny jeans are out, by the way).
Updating your interior paint colours can overhaul your mood, this very purpose can help us to re-energise and feel warm and cosy this Autumn.
“When we talk about design and colour, we’re talking about how it feels — not just how it looks. “When we’re at home it’s important to feel the best you can.”
“Colour is coming back into homes and Aussies should feel empowered to move away from pure white walls –
As we enter the cooler months, now is the perfect time to update your home and embrace the colours of the season. This autumn, we can expect to see a combination of warm neutrals that help to create the cocooning atmosphere we crave in our homes as the seasons change.
Wrap the room
To move away from all-white ceilings, consider running your chosen wall colour onto the ceiling to create a truly enveloping feeling. For this living room, we painted the main walls and ceiling in Beaten Track paired with the slightly earthier Stilted Stalks on the fireplace wall to make it a clear focal point
Use tonal colours: Selecting two warm earthy colours and running them from floor to ceiling, as illustrated here, wraps the room in warmth.
When planning your autumn design update, look for ways to highlight your home’s unique characteristics and embrace your natural surroundings.
Adding a deep hue can be a fast and effective way to accentuate existing architectural features, like how we have opted for the rich, warm mid-tone Brown & Neutrals on the opening that leads to the home’s main entrance.
How to Paint a Front Door
If you’re looking for simple ways to beautify the front of your house while also protecting it, painting your front door should be at the top of your list. Whether for resale or for your own enjoyment, a newly painted front door boosts curb appeal and gives the whole house a fresh look. Because front doors bear the brunt of weather extremes, painting the door increases its durability and extends its lifespan.
Basics of Painting a Front Door
Nearly any front door that is made of wood, fibreglass, or steel can be painted. Many exterior front doors are sold unpainted and otherwise unfinished, with the expectation that the owner will paint it. Front doors with peeling, cracking paint can usually be successfully refurbished and re-painted.
Prep Work
The key to an attractive, long-lasting paint job is to thoroughly prepare the door. The door should be cleaned, sanded, patched where needed, primed, and then painted. Painting over peeling paint, dirt, dust, or cracks and holes will significantly reduce the paint job’s lifespan.
Removing the Door
Ensure a great front door paint job by removing the door from the hinges and painting it flat on sawhorses. Painting the door horizontally reduces drips. Additionally, removing the door gives you access to the hinge-side and bottom edges of the door.
Front Door Paint
Oil-based paints take longer to dry than water-based latex paints, stretching this from a one-day to a multi-day project. Plus, oil-based paints and related tools must be cleaned up with paint thinner or mineral spirits. However, oil-based paints are more durable than water-based paints and help to reduce brush marks.
Water-based latex paints are easy to work with and they easily clean up with water. Unlike oil-based paints, latex paints can be found in low- or no-VOC form, making them green and eco-friendly.
Semi-gloss or glossy paint sheens offer better clean ability. If you value the look of flat or matte paint for a more contemporary look, just know that they scuff more readily than glossy paints. For flat/matte doors, it helps to have a can of paint on hand for quick spot touch-ups.
When to Paint Your Front Door?
Schedule your painting project during warm, dry weather since your house will be open and exposed. Start early in the day since you need to lay down a second coat of paint before re-installing the door.
If you want to replace the door the same day, paint the exterior side and the four edges first. Then, if you run out of time to paint the inside of the door horizontally, paint it after it has been re-hung.
Should I use Primer before I paint?
Using a primer before you paint is a great way to improve the quality of your paint job. You don’t need to prime your surface in all situations, but used properly, a primer can make all the difference.
When You Should Use a Primer?
Priming before you paint isn’t always necessary, although there are occasions when priming your surface can help you achieve a perfect, professional finish.
Here’s when you should prime before you paint:
Your walls are brand new. All new plasterboard needs to be sealed with a primer before it is painted.
If your existing paint job is dry and chalky. Paint becomes chalky as it begins to breakdown. In this case, you’ll need to wash the walls thoroughly, and apply a suitable primer to create a smooth surface for the new paint to adhere to.
If you are painting over oil based paint with acrylic paint. Acrylic paint won’t adhere properly to oil based paint unless an acrylic primer is used.
If you have mended cracks or holes. New plasterboard should be sealed with a primer.If you walls are currently dark, and you want to paint them a light colour. The primer will help cover up the dark hue, so your new, light paint will show up brighter.
The Benefits of Using a Primer….
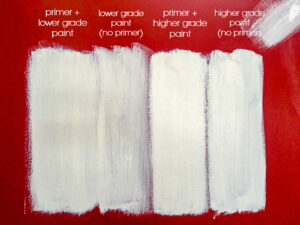
Painting a primer on your surface is a simple way to improve the finish of your paint job, and make it last longer. In most situations you can achieve better results with one coat of primer and one coat of paint, rather than two coats of paint.
Here are few benefits of priming your walls before you paint:
Priming will ensure your colour is rich and vibrant. Primers can hide the colour you are painting over – even dark reds and blues – so the old colour doesn’t alter the new colour.
Priming will create the ideal surface for paint to adhere to. While paints are rich in pigment, primers are rich in resin. This means paint can cling to primer more effectively than old paint. Primer also evens out your surface, so you can achieve a consistent finish.
Primers can prevent stains. Primers seal the surface, and therefore block out stains so they can’t ruin your paint job.
Primers can increase the longevity of your paint. Primers can help prevent peeling, cracking and blistering. They will also ensure the paint colour doesn’t fade.
Christmas 2022
Have you completed your Christmas shopping? Paintway have been “wrapping up” (Pardon the Pun? hehe) all of our Christmas gift shopping over the past week, but I still have a few gifts left on my list. We have been so busy this month, it will feel great to have our shopping and gifts all set to go so we are ready to relax and enjoy time with family and friends.
Paintway would like to wish you all a very Merry Christmas 🎄 and would like to take the opportunity to thank you all so much for your business in 2022.
We would like to leave you with one more Painting Tip for the Year.
Thinking of painting your home and want to know the paint colour trends forecasted by the interior design experts for 2023? As professional painters we see the trends and know what works. Trends in interior design are as cyclical as those in clothing and furnishings. The good news is that updating your walls is practically as simple as updating your wardrobe.
Its all about making Changing Colours inside your home can have a great impact on your mood. Which is precisely what is necessary as the world emerges from the pandemic’s gloom. It’s for this reason that one of the new colour palettes has been selected: to give us a much-needed boost of energy and positivity.
If you are planning a house makeover, ensure you hire a QUALIFIED Painter to redecorate the interior paint, if you are trying to decide what colour to repaint your newly constructed or renovated home, Just call us and we can help you with all those decisions.
Merry Christmas Toowoomba 🤶🏻
Paintways 7 Simple Steps to Calculate the Amount of Paint Needed for your Painting Project
When wanting to repaint your home, there are a number of things to work out first before that brush ever touches the paint. Once you have found the perfect colour for your living room, the next step in the process is to find what the best paint to use is and how much you will need. Calculating the amount of paint you will need doesn’t have to be difficult, and Paintway’s guide will be able to easily figure out how much you need.
1. Measure up your room
The first thing to do to determine how much paint you will need for your project is to measure all of the walls you want to paint. This is done with a simple calculation to help you quickly find the average amount of paint in litres for a single coat of paint. You will need to measure the surface area of your room, discounting the ceiling and the floor. To do this you should measure all of the walls in your home from ceiling to floor and wall to walls. Add the measurements of the width of your walls multiply them by the height of the room to determine the square metre size of your room.
2. Take into account windows and doors
When measuring the surface area of your room, you may not be painting the ceiling or the windows and the doors, so you need to determine the size of these surface areas and discount them from your calculation. With your square metre number, simply subtract roughly 1.85 square metres from your calculations for your doors, and perform the square metre measurement for your windows to find their size. Simply remove this number from your initial calculation to determine the surface area of your room.
3. Buying the right amount of paint
With your calculation determining the surface area of your room, you are now ready to purchase the right amount of paint – but wait there, it all still depends on how many coats you want to give the walls, as well as the viscosity and type of paint you want to use. On average, a 4 litre bucket of paint will allow you to paint roughly 32 square metres of wall for a single coat.
4. Number of coats
Whilst many people simply paint over the previous colour until it is no longer visible, the best painting services paint has to offer often like to add a primer coat in order to blank the previous pant, as well as paint a tint layer to bring the vibrant colours to life for a more professional look and feel. You will need to calculate how many coats you will need for each room, so test out your walls with a tester pot of the paint of your choice to see how it holds and finishes before purchasing more.
5. Finalising your calculations
When you have determined how many coats of paint you want to put on your walls, and the surface area of your rooms, you will need to divide the paintable surface area of your room by the square metre capacity of a 5 litre tub of paint. If your paint comes in smaller or larger sizes, use this number to determine how many tubs or tins of paint you will require to finish the job properly. If you find that you are short by a little, order a few small tins to make up the difference, but if you find that you will need more, then go for the extra big tub to make sure you can finish with a little spillage into the equation.
6. Using a paint calculator
Using an online paint calculator can be a simple way of quickly getting the amount of paint you will need for the room to be painted. Taking rough guesses is a good way to determine roughly the cost of your painting project, but getting the precise figure is the best way of making sure that you don’t go over budget, or come up short when that special paint you bought at a discount is no longer available.
7. Paint your walls
Painting your walls accordingly will be the best part of your final calculation and will make all of the hard work worth it in the end.
If you are in any doubt about the calculations and price involved in high quality paint, or the types of paint you will need for your particular rooms finishes, don’t hesitate to call Paintway, who will be able to talk you through the process, and give you a solid estimate on the final price for the job done.
We often get asked…”How is the cost of having our House Calculated?” Here is How:
Considering painting your own home?
Painting is one of the quickest and easiest ways to give your home’s interior a facelift — and it is one that can produce dramatic results as well. Unfortunately, many homeowners feel overwhelmed when tasked with choosing a lasting color scheme. To avoid getting stuck with a less-than-perfect color choice, they will spend hours studying the subtleties between Smokey Topaz and Roycroft Suede paint swatches, considering the mood they want to create (whimsical? relaxing? modern edge?), and deciding whether to trust their guts or hire an interior decorator to make sure things turn out just right.
Fortunately, interior painting doesn’t have to be that difficult. Most paint stores offer samples that you can take home for a wall test. With these samples, you can paint a few colors in large swaths on your wall to see the how the paint interacts with the room’s natural light. And you can compare it against design elements like pillows or furniture to see whether it will work with your overall decor as well.
On This Page:
How Much Does It Cost to Paint a Room?
Estimating Room Painting Costs
Interior Painting Costs & Considerations
How Much Does it Cost to Paint a Room Yourself?
Calculating Room Painting Costs
The cost to paint an average size room (10X12) ranges from $380, not including ceilings, trim or cost of the paint. DIY, this can cost between $200-$300. When estimating the cost, Paintway will start with how much paint will be required to complete the job. To know this, we first need to know the size of the area to be covered.
The easiest way to calculate the size of the paintable area is to add together the length of the wall and multiply it by the width of the room from floor to ceiling. The resulting amount is the room’s square footage. This total is a starting point, as it is not all paintable surface. Paintway won’t paint the windows and doors, for example, and they must account for ceiling trim and baseboards as well.
The next step is to subtract the area of the doors and windows — along with the square footage of the trim and baseboards — to get an average. Then, use the same calculation (length x width) on the windows, doors, trim and baseboards, and subtract all of those numbers. The result of this equation is the square footage of the room’s walls. This is your surface area number. We will typically add a little square footage back in to this amount to account for extra paint, which may be required.
Room Painting Cost Factors Here are some other cost factors to consider when it comes to the cost of painting a room:
Size of Room to be Painted
The size of the room to be painted is the most important factor in determining the cost of professional painting. It will take a paintway longer to cover a large room than a small room, and this means higher labor costs in addition to supplies and time. When estimating the paint for such a job, keep in mind that a litre of paint covers about 400 square feet (though the label claims it will cover 450 square feet). You will be charged for the number of paint cans needed, among other factors.
Textured Walls
A textured wall will need more paint than a smooth wall. The texture adds more surface area, even though it doesn’t increase square footage. Determining the additional surface area depends on how much texture there is. Paintway will probably estimate about 300 to 350 additional square feet of paint to account for texture. Factor additional surface area into your square footage calculations when seeking professional estimates.
Speed Factor
The speed with which a paintway can complete the job will determine its final cost, but time is difficult to estimate. Some painters have more experience and cover a wall faster, but some are more methodical and take more time. Most painters should be able to cover about 100 to 120 square feet of flat surface in an hour, unless they are working on a very large wall. Wood or plaster might reduce that amount to 80 to 100 square feet. You should also consider the time required for a first coat to dry before a second coat may be applied. This will add time as well — anywhere from one to 48 hours depending on the paint.
Multiple Rooms or Whole House
If you decide to paint multiple rooms in your home, choose colors that relate to one another without being completely the same — unless uniformity is your goal, of course. Costs may vary based on differences in color, gloss and room size. However, each room will flow depending on the trim’s color — which should all be white or neutral — so they look connected.
A whole-house color scheme presents the same cost factors as painting multiple rooms individually: colors you choose, the gloss, the size of the rooms and time/labor. You can choose to use the same color throughout your entire home to save on money, or you can use a color scheme with the same gloss throughout, though this isn’t recommended for selling purposes.
Interior House Painting Cost Factors
Average Paint Prices
Generally, it will take a minimum of two litres of paint to cover a room. At the highest end, paint will cost anywhere between $30 and $60 per litre and come in three different finishes: flat, semi-gloss or high-gloss. Flat finishes are the least shiny and are best suited for areas requiring frequent cleaning. Semi-gloss finishes are a bit shiny but can also be easily cleaned. A high-gloss finish is stain-resistant and easy to clean. Traditionally, living rooms should be painted with a flat finish to allow the paint to stand out. Glossy finishes should be reserved for hallways, and a semi-gloss is best suited for trim. Invest in pre-primed paint whenever possible. This cuts down on time by combining the layering process.
Almost any paint job will require a primer, which will cost anywhere from $7 to $15 per can. Primer helps the paint to stand out against the underlayer of paint it’s covering, especially if the new paint is lighter than the old coat. You will need at least two cans of primer, if not more, to cover one wall.
Supplies Needed
Paintway will typically provide most of the supplies for a project, but sometimes they will allow you to pay for solely labor if you provide all of the materials yourself. You might decide to do a DIY paint job down the road, in which case having these supplies on-hand will save you time and money. The supplies you should invest in include:
Brushes: Trim and sash brushes for intricate painting, beaver-tail handles on larger brushes for larger surfaces.
Tape: Standard painter’s tape to protect trim and ceilings from droplets.
Drop cloth: To protect floors and furniture from drips.
Paint tray: To keep out only a portion of paint rather than drying out an entire litre.
Paint rollers: A quick way to cover a large portion of a wall in paint.
Ladder: Necessary for reaching high areas (don’t use a chair!).
Small brushes: For touch-ups.
Additional Updates
Consider having your molding, trim and baseboards checked while you have a professional painter in your home. This might be a good time to upgrade or repair any cracks, warps or other issues. Paintway usually touch up or replace these items for an affordable rate, and they may even package such fix-ups with your painting project.
Cost of Painting a Room as a DIY Project
A handy homeowner can buy paint and equipment for about $200 to $300. Don’t forget to factor in the time it will take you to do this yourself though. Depending on the size of the room and how much help you have, this could be a day project or a weekend project.
Here are the general steps to follow when painting a room on your own:
Decide on a color palette: Earth tones and neutrals will cover up marks, scratches and hand prints.
Buy supplies: You will need rollers, brushes and other supplies (see above) in addition to paint and primer.
Remove furniture: Remove all furniture from the room to protect it from drips and avoid trips and falls.
Clean the walls to be painted: Clean with a water and detergent mixture. For any stains, use trisodium phosphate.
Remove outlet covers and switch plates: Remove but don’t paint the sockets or switches. Turn off electricity in the room to avoid an accidental shock.
Outline: Put any painter’s tape over baseboards, trim and edging to avoid drips.
Paint the first coat.
Apply the second coat.
Touch up: Touch up baseboards and ceiling trim as needed. Also touch up any spots on the wall.



 Problem Ceilings? (Peeling and Flaking Paint)