How Does Sealer Help In Painting Wall?

Painting is one of the top home improvements, which is also recommended since it enhances the value of your home. In painting, there is more that is involved. A sealer, or sometimes called primer, is a vital aspect to consider when painting the wall. Sealer is essential when you are painting the interior walls of your home. Regardless of the brand or quality of paint, a sealer coat helps a lot. And it is quite a priority to consider when you are painting the interior walls.

Why should you use a sealer coat on your wall?


When painting the interior walls, it is advised to apply the sealer coat, before you can use the paint that you prefer. So, why is the sealer coat such a vital layer to consider when you are painting your interior walls?

• Perfect bonding layer

The sealer is known to have natural bonding agents. These bonding agents allow the sealer to stick to the surface of the wall. Even when the wall is old or new, the sealer will stick to it and make it to bond on tightly to the wall. When you apply the sealer to the wall, it will allow the paint to stick to it. With this, the paint will not peel off, like it would when applied directly to the wall. Some paints will not stick to the walls, especially with the old walls. Old walls can have a rough surface that is ruined by the oxygen in the air. Nonetheless, the sealer helps to make the bond and not peel off as it dries off.

• It preserves the quality of the paint

Another advantage of applying the sealer is that it helps to maintain the original quality of the paint. Some paints will lose the original quality when they are used on an old wall. When the wall is old, it will be chalky, damp, and it might react with the paint. The paint contains some chemicals, which might react with the content of the old wall. If the wall was initially painted, the paint could be absorbed, along with water inside the wall. As the new paint is applied, without the sealer, it can end up reacting with the wall.

The chemicals in the new paint can react with the old wall, and a new color will start forming on the wall. Other than a different color forming, the paint can start to crack when it is dry. This might be as a result of the reaction between the new paint and the old wall.

• It helps to seal off the cracks and holes on the wall

Regular paint might not be able to cover and seal the cracks that are on the walls. Nonetheless, the sealer helps to cover these cracks and holes when it is applied before the paint. That is why it is recommended to apply the sealer before painting the wall. When the cracks are covered, the paint will look and feel smooth when it is applied after the sealer.

5b791-shutterstock_277839539


When Do You Need The Sealer?

The sealer should be used in many situations, but it is not applicable in all the walls. Some walls need the sealer before applying the paints. Alternatively, other walls will need the sealer before you apply the paint. So when do you need to use the sealer on the walls?

• If the wall has a lot of stains

The sealer plays the role of covering the stain that is on the wall you intend to paint. With this, you will have a clean surface that you can then apply your preferred paint.

• If the wall has cracks or holes

If the wall is old and porous or has some cracks on it, it will need to be covered before applying the paint. The sealer helps to cover every hole or crack that is on the wall, thereby giving you a soft surface to apply your paint. So if the wall is porous, or if there are some cracks in it, you will need to apply the sealer before you start painting it.

• If the wall has flaked off in some areas

Suppose the wall has peeled off in some areas, leaving it to be unlevelled, it will mean that the paint will take the same surface. In the long run, the paint will appear to have some recessed areas, which might not be pleasant to the eye. The sealer will help to level the flaked off areas and make the final paint look leveled.

6bdc8-shutterstock_145541452


• If the wall is chalky
Most of the chalky walls tend to be slippery when you apply paint to them. The powdery surface will mean that the paint will not bond or stick to the wall. That is why some paint will peel off as they are drying on the wall. The sealer acts as an intermediary between the paint and the wall. So with the chalky surface, the sealer will create a sticky surface that you can then apply your paint. When the paint is applied, it will not peel off, even when it dries off.

• If you need to paint a dark colored wall paint

If the wall that you intend to paint has a dark color, the best solution should be to apply the sealer, which will then create a surface to apply the new paint. This also helps you to save money in the long run. A sealer tends to be less costly than a regular paint. So instead of applying more paint to cover the dark paint on the wall, you can apply the sealer to cover the wall. The sealer is also thick enough, and you might only need a single coat then you apply the regular paint. If you were to apply the regular paint in the dark color, you might need almost four coats to cover the color completely. This can be too expensive.

With the sealer coat, it helps you to save money. Also, it will make your wall look elegant. Always choose a high-quality sealer to enhance the final surface of the wall.

Shopping for a Painting Contractor? Here are some Tips to help you find the BEST painter for you.

When we are asked to go out to do a quote on a proposed painting job…we are very aware that we are are often competing against other painting contractors.

We can  explain to our customer WHY we are the most reputable and honest painters in town, but we understand that there is more the Customer needs to take into consideration, than just a “PRICE” Presentation and showing up on time doing a quote can certainly set the standard for the upcoming potential relationship that there is soon to be had.

Some of the time, Price is always the first on the customers mind and sometimes budget is a very big consideration for yourself and also for us here at Paintway. So we are always try to  meet your budget with the quality of work that we provide 🙂


There is a huge difference in painters’ ability, skill level, knowledge and professionalism. Often times people remark that painter “X” is expensive while painter “Y” is cheap.  Many times there is a reason for the prices painters charge; often the more expensive painter is the better painter. Inexpensive painters often don’t know how to adequately factor in all their costs and usually price the job too low. When this happens, the customers pays the price because the painter has to rush off the job, will use low quality materials and/or will not return your phone calls or return to the job if there is a problem.

Call 3 competent painters:

Don’t call out ten different painters and get estimates from each one, that wastes everyone’s time.  Know what type of painter you want before you call people out to your house.  If you want an inexpensive paint job, and you are willing to compromise on quality, tell the painters that.  If you want a high quality job and are willing to pay a fair price for it, tell the painters that also. Know what you want and be direct with the painters. This saves everyone’s time.

Call the painters and interview them by phone first.  Listen as they speak to you.  If the painter doesn’t sound right, don’t invite him over for an estimate. Phone estimates are your first phase of information gathering.  Invite the painters who sound competent to your house for an on-site estimate.  Ask the painter to speak to a few of their past customers.  If they cannot supply these names for you, consider that.

Ask for a painter recommendation from your local paint store:

A great place to ask for painter recommendations is your local paint store. Paint store managers know their painters.  They know about the painter’s professionalism, skill and quality level.  They see the quality products the painter buys and whether or not they pay their bills, if they show up at the store drunk or sober, if they are responsible, and if they know the painting trade.

Beware of using low-end paint from cheap painters:

Often, cheap painters use low-grade paints and products in people’s homes and the customer has no way to check on this. This is unfortunate because the cost difference to the customer between the best and worst paints is about 30% in material costs.  A small price difference, but the difference in quality and how well it will last in your home is significant. Expect the cheap painter who low balls your bid to buy the cheapest paint.

Homeowners should have the painter specify the specific paint product they will be using. It is not enough for them to just specify the paint manufacturer. Every major paint brand makes several grades of paint ranging in quality from low to high.  Expensive paint costs more money but is worth it.

Just because your friend/neighbour got a “good” job , doesn’t mean the painter is good:

Using a reference from a friend is the most common way of finding a painter. And while sometimes it works, sometimes it doesn’t. Your friend may not have had any problems or may not know of any problems they do have. It is fine to consider their recommendation, but make sure you check additional references and use your instincts.  Know the type of job you need.  Friends and neighbours think they know a good painter from an unskilled painter.  My experience has shown me that they don’t a good painter from a bad one.  They form their opinion on one being a good painter based on if he was cheap and if the house looked clean when the painter finished. That isn’t the way to determine quality house painting.

Important questions to ask your house painter: 

1.  How many men will work at the house and for how many days?
2.  Is the painter licensed and insured?
3.  How long has his painters been working with him?
4.  What brand of paint will be used?  What specific grade level of paint will be used?  All manufacturers have many grades of paint.  They run from high quality/expensive to low quality/inexpensive
5.  Will you be priming the surfaces before you paint?
6.  How many coats will you be applying?
7.  Have you included everything in your estimate or could there be additional charges for work?
8.  How will you dispose of the trash and old paint?
9.  What type of paint is currently on my house?  Will the new paint stick to it?
10.  How will you clean the house prior to painting?
11.  What are the payment arrangements?
12.  Is there anything else I haven’t asked that you should tell me?

Visit us here on our Facebook Page to Learn More 🙂

How to use a Paint Roller | News – How To


Cover your paint tray with a plastic bag in between breaks to stop the paint drying out.
Cover your paint tray with a plastic bag in between breaks to stop the paint drying out

Rolling Paint is not quite as easy as it seems. Knowing how to use a paint roller is a fundamental part of how to paint and therefore should be one of the first things you learn how to do before you start your DIY painting project.

Choose a quality roller:

It is important to choose a quality roller over price as a good quality sleeve will hold more paint which therefore allows you to paint a room faster. If you are using a roller for the first time we recommend a 230mm roller.

The length of the pile known as the nap is important to consider. The reason this is so important is due to different surfaces requiring different lengths e.g. a smoother surface requires a shorter nap. We recommend using a 5-6mm nap when applying oil based paint to a smooth surface. We recommend using a 12mm nap for water based paints on smooth surfaces such as walls and ceilings.

Be sure to check the product packaging you are using for the best roller recommendations

Preparing to use your roller:
For oil based paints use turps to moisten the roller and for water based paints use water.

Use a piece of scrap timber or butchers paper to get rid of any excess moisture on your roller. It is important not to use newspaper to get rid of excess moisture as the roller can pick up the ink.

how_to_use_a_paint_roller


Loading your roller:
To ensure the roller is evenly covered dip it in the paint try turning the roller.

To evenly distribute the paint roll it over the rigid part of the tray a few times without plunging it back into the pool of paint. Do not overload the roller as it will cause it to drip or slide.

Applying paint using your roller:
By painting 1-2 metre stripes at a time it will be most effective. Your first stroke should be up as if you roll down first the paint will cause a puddle under the roller. Do not move the roller too quickly as it may cause a spray.

Start as if you are painting a large M, W or backward N then fill in the blanks with horizontal or vertical zigzag strokes. Finish off by rolling gently top to bottom with the roller nearly dry

As you move across the wall repeat this process. If you want to break wait until you get to a corner and don’t stop painting until the wall is complete.

For the ceiling it is best to finish off near a light source such as a window.

Taking care of your roller:
Before you wash your roller scrape any excess paint off by using a putty knife or scraping tool with a semicircular cut out in the blade.

Wash the roller in warm water and detergent if using water based paints or use a solvent as specified on the can for any oil based paints.

Rinse the roller and squeeze it out until the water or solvent is clear and allow the roller to dry naturally.

Best of luck in your DIY Painting Project??


Join Paintway on Instagram and Facebook 

Join Us ?


Spraying Vs Rolling

ht_paintaninteriorroom_paintceiling

Here at Paintway we often get approached by quite a few clients to explain the difference between rolling and spraying when applying paint systems. Therefore, we would like to take this opportunity to outline the pros and cons for each application method and dismiss the numerous myths.

Below are the pros and cons of both systems:

Rolling on paint,

Invented in 1940 by Canadian Norman Breakey, the paint roller is the traditional method for painting large surfaces such as walls and ceilings in order to achieve a smooth and uniform finish without the visible brush stokes.

Rolling on paint requires minimal preparation and clean up time and allows an easy flow of workmanship. Rolling on paint allows a painter to apply thick, and lightly textured coats of paint.

Spraying on paint,

The spray gun stems from the invention of the first airbrush which was patented in 1876 by American Francis Edgar Stanley. As such, most people may not be aware, that the first spray gun machine was developed in 1887, predating the roller by almost 53 years.

Spraying on paint requires large amounts of preparation time to ensure all areas not to be painted; i.e. windows, architraves and floors, are taped, marked or covered before application begins. Once spraying has begun, application is faster, can cover larger areas with a uniform and smoother in finish.

Most good painters will then “back roll” their spray work, especially on ceilings and walls to push the paint into the surface pores. This will also give a lighter, textured finish, while ensuring any cracks or joins are also filled in. The finished result of “back rolling” also ensures surfaces are easier to “touch up” in years to come.

In conclusion

Rolling

(+) Less preparation time

(-) More preparation time

(-) More application time

(+) Less application time

(-) Difficult to paint tight areas

Spraying

(+) Easy to paint tight areas/detail

(+) Even usage of paint quantity

(+) Even usage of paint quantity

(+) Less clean up time

(-) More clean up time

Neither spraying nor rolling on paint is much quicker than each other when taking into account the relevant preparation and application times. Also, neither method may use more paint the other, with modern day spray machines involving computerised measurements.

While spraying is a great way to paint harder to reach areas, such as cupboards and shelves or uniformly paint detailed items such as lattice, both methods are used depending on the requirements of the paint project.

How Paint Colours Can Actually Change your Life

A small paint colour change can make a huge difference in your space. Paint colours could be used to bring positive energy to every room of the house.

For a couple’s bedroom, you want harmony and romance.    orchid-bedroom

You want to focus on your purples and pinks, or lighter like orchid, What this does is creates harmony and intuitive love. So you would be embracing romance from the standpoint of love and how you are intuiting the person. It’s a fabulous way to approach relationships in the bedroom (literally and metaphorically).

Family spaces speak better in peaches and beiges.  

peach-and-beige                                  

These colours will create the awareness of laughter and a sense of family and community, so you’re embracing the whole group in the house,

For accents,  you can also do ivory or light blue, but be careful when  when using pure whites: You want rooms separated with lines, colours that will move into the arena of change. With ivories you’ll be defining the rooms, creating borders and boundaries.

In a kitchen, you want to encourage health and growth.

mauve-and-light-blue

Greens are good on cabinets and counters but not on walls, and we suggest mauves, light blues, and aquas as accents. You don’t want to keep much white except for appliances, which are best in silver, white, and other neutrals, White is a static colour, while blues and greens are harmonious and foster growth.

Yellows and greens in a child’s room foster healthy emotional growth

yellow-and-green

You want the child to grow emotionally, but you don’t want them to focus on emotions in a way that makes them volatile, We suggest yellows and greens and to stay away from colours like red that spark strong excitement but also strong anger.

In a home office, greens and greys foster creative and financial prosperity.

green-and-grey

Whenever you want colours for money and success, that’s the green family, That helps you to embrace growth — both financial and personal.

In a single person’s bedroom, blues and greens provide calmness.

blue-and-green

Blue gives you an aspect of communication,And what you’re communicating to yourself is a calm, allowing yourself to feel very serene and at one with your own energy. You can also incorporate shades of green, or different patterns that are greens and blue. That speaks to healing and the heart chakra. This is encouraging, and it means they are not going to be single for long, but while they are single they are in a good place. They’ll feel good about themselves.

In a space shared with roommates, tans and browns allow for reason and communication.

brown-and-tan

Variations on brown or grey in a light hue are best,  and not white or black. It allows people to reason. They’re not seeing things in black and white they’re seeing things in detail.

Visit us today at paintway2019.au3.live-preview.net or Visit us on Facebook

How to revive a old Kitchen with a Fresh Coat of Paint

How to Paint Kitchen Cabinets
Many old homes have a recurring issue with a claustrophobic kitchen. Dark wood paneling on the cabinets combined with a ’70s paint job makes the whole room feel enclosed, dark and stuffy. Sometimes even a nice window refuses to let in enough light to brighten up the place. In these cases, it is amazing what a little paint can do. Coat your cabinets with a light colored paint and suddenly the space feels much more open and airy.

Painted-Kitchen-Cabinets

Step 1: Make Decisions

You probably won’t be able to take one look at your cabinets and decide what paint color you want. Do you go for a pastel shade of blue or green? Is a yellow shade more appropriate for the rest of your decor? Bring home a set of sample paint swatches and picture what the room will look like primarily in that color. If you have talent with a computer graphics program, you can even attempt to simulate it.

Once you have decided on your color, you can also decide on your hardware. Do you want to keep the old drawer handles and hinges, or will you update to a more modern set? Be aware that new hardware might not be able to use the same holes as the current hardware, so you may need to adapt to different spacing.

Step 2: Prepare

Buy your paint. Buy your hardware. Buy your paint supplies, including any brushes and small rollers you want. A pair of small rollers and a pair of angle-tipped brushes should be plenty. Pick up a drop cloth to paint on. They only cost a couple of dollars and they serve quite well for this and other house painting projects. For kitchen cabinets, you will probably want a latex paint with a semi-gloss finish. This makes a nice resistant surface for later cleaning. You can always bring a detached door to the hardware store and ask the people who work there what kind of paint they recommend.

Once you have all of your supplies, remove all of the hardware from your cabinets. This includes the hinges, so you will be removing the doors as you go. Store all of the hinges and handles in a single bag so you never lose a piece. Once all the doors are loose and the cabinet frames exposed, it’s time to clean. In all likelihood, years of grease and grime have built up on these wooden surfaces. Take some grease-cutting soap and scrub them clean.

Stained-kitchen-cabinets

Step 3: Preparing the Surface

If you chose to go with new hardware, you may have discovered that it doesn’t quite fit in the old holes. You will need a tube of wood filler from your local hardware store to patch the old holes. When you’re painting cabinets like this, you won’t need to worry about matching the shade of the wood too closely. This is also the time to patch any annoying gouges and dings on the cabinets themselves. This way you’ll have a nice smooth surface once the paint is applied.

Examine the surface of your cabinets. Is it shiny? Chances are it is covered with layers of protective polyurethane. If you need help deciding whether to sand, feel the surface. Is it matte and slightly absorbent like a good cutting board? It’s probably fine without sanding. Does it feel more like a piece of plastic? Chances are you should sand it. If they are already painted, see if you can determine how old the paint is. Old paint might contain lead, and it’s best to remove it before you paint over it. Be careful! Lead paint is a health hazard, and sanding will get particles of it everywhere.

Painting-cabinets

Step 4: Prime Everything

Even though you have already cleaned and sanded your cabinets, there still may be years-old grease stains deep in the wood. Don’t worry about sanding them out. Primer paint is designed specifically to hide these kinds of things. You will probably want to go for an oil-based primer, because grease stains have been known to seep through water-based paints and show on the new surface. One coat of oil-based primer should work perfectly for your cabinets.

Using a small paint roller, apply primer to the cabinets. You can use a small brush to work the paint into smaller grooves and patterns that the roller won’t reach. One coat should be plenty. Your primer is only there to cover the majority of any color, pattern and stain underneath. It serves to prime the surface for the actual paint later on. Once you have applied the primer, go ahead and let it dry for a couple of hours. Don’t worry about cleaning out the roller and brush — oil-based primer is hard to clean. Save the tools for any later house painting projects you may have.


Step 5: Painting

The primer should be tacky but dry by now. You can do the majority of your painting with a small roller, using your brush sparingly. This helps minimize the texture difference caused by brushstrokes and helps you paint more quickly. You will want to wait for the first coat to dry before applying the second coat. It is entirely possible, if you started early, to finish priming and painting cabinets in the space of a day.

The process of painting is where all the fun is. You get to see your chosen color displayed for the world on your cabinets and drawers. Use a steady hand to roll on paint in even strokes. Your roller is perfect for most of the cabinets and doors. It will let you easily cover the flat surfaces. For smaller crevices and grooves in the wood, use a small brush with an angled tip. The angle will help you work paint into the small grooves and corners without leaving large drops pooling in small recesses.

Did you plan to paint the inside of the cabinet doors? If so, do the inside first. You should let the primer and paint dry for several days before flipping them over to paint the outside. You do the inside first so that if anything goes wrong when you flip it, the mistakes are mostly hidden. You wait several days so the paint has had time to solidify and can resist damage.

Step 6: Finishing Up

Paintway advise you to wait for at least three days before hanging your doors once more. This gives the paint plenty of time to dry and harden. Five days is best for the most safety.

If you’re using old hardware, simply reattach it where it was before and replace everything. If you’re using new hardware, you will need to drill fresh pilot holes for the new screws. Make sure you follow the old construction adage. Measure twice, cut — or drill — once. Even taking your time, this will only take an hour or so. Finally, with your freshly painted doors hung once more, you can enjoy your new kitchen


Why Choose Paintway Toowoomba to Paint Your Home?

When you invite us into your home, The Paintway  team will act respectfully and be as considerate of your space, and life, as possible.

Our promise

Paintway promises our homeowners that we will: start and finish on time; maintain a neat and clean project; make sure our language isn’t offensive; take care of all details; and stand behind our work. We care about how you feel while the work is getting done.

Paintway’s approach to interior house painting

The inside of your house is where you relax, unwind, entertain and it is truly the space you call home. Creating rooms you will enjoy requires thorough prep work and extreme attention to detail, but that’s not all—it requires ongoing communication, trust, and respect.

Five steps to a successful paint job

  1. Discuss your desired end result
  2. Consult with James for colour and finish recommendations
  3. Protect all your surfaces and belongings
  4. Properly Prepare all interior surfaces to be painted
  5. Use top quality tools to expertly apply your coatings

Top quality tools. Top quality results.

Paintway generally uses Luxury and Dulux paints. The brand of paint used is influenced by many factors including customer preference, the nature of the project, and bid specifications. When selecting a brand of paint, we recommend using the highest grade available because the best paint will provide the best results. To make sure the finish is everything it should be, we use top quality materials, tools and supplies.

 270702_215347401842272_154771827899830_624733_3998066_n

Paintway understands that we are reflecting your values when working on the exterior of your home and pay attention to the details when making your home and neighbourhood more beautiful.

We understand that the exterior of your home is the first thing a visitor sees. A beautiful exterior shows the world that you care about your home and the community you live in. Our thorough prep work and extreme attention to detail is an important factor when painting the exterior of your home, it helps create a good impression for you and your neighbours. We pride ourselves in the relationships we build with our customers, through ongoing communication, trust, and respect.


Considerations to Make If you are going to Paint your own Home.

87796856_XS


Painting the whole outside of your house is a major job. But your home may not need a whole paint job. You may be able to spiff up the appearance of your home and extend the life of an entire paint job by several years with regular maintenance and some quick repairs. Whether you decide to paint a porch, the most weathered side of your house, or an outbuilding or two, the general process is the same as painting your whole house.

You’ll need to clean and prep the surface, decide what type of paint to use, and apply the paint. The best time to paint is in late spring or early Autumn on a dry day that is not too sunny. Temperatures below 40 degrees F and direct hot sun can ruin paint jobs. Inspect your house thoroughly before you paint, and take corrective action to prevent the root causes of paint failure.

We’ll hit on all the basics of exterior painting in his article, starting in this first section with how to deal with various paint problems.

Peeling

Peeling is often the result of painting over wet wood. It can also result from moisture within the house pushing its way out. If you cannot control the moisture with exhaust fans, use latex primer and latex paint. Latex allows some moisture to pass right through the paint.

Another cause of peeling is a dirty or a glossy surface. To undo the damage, all loose paint flakes must be scraped off with a wire brush and the surface must be sanded to smooth sharp edges. Bare spots should be primed before painting.

Alligatoring                  Unknown

This problem looks just like its name suggests: the hide of an alligator. Paint shrinks into individual islands, exposing the previous surface, usually because the top coat is not adhering to the paint below. Perhaps the paints are not compatible or the second coat was applied before the first coat had dried. To get rid of this problem, scrape off the old paint and then sand, prime, and repaint the surface.

Blistering

Paint that rises from the surface and forms blisters is usually due to moisture or improper painting. To fix the problem, first scrape off the blisters. If you can see dry wood behind them, the problem is due to moisture. If you find paint, then it is a solvent blister and is probably caused by painting with an oilbase or alkyd-base coating in hot weather. The heat forms a skin on the paint and traps solvent in a bubble.

Wrinkling

New paint can run and sag into a series of slack, skinlike droops. This occurs when the paint you are using is too thick and forms a surface film over the still-liquid paint below. It can also happen if you paint in cold weather; the cold surface slows drying underneath. To recoat, make sure the new paint is the proper consistency and be sure to brush it out as you apply. Before doing this, though, you will have to sand the wrinkled area smooth and, if necessary, remove the paint altogether.

Chalking                  rockledge-exterior-repaint-ceiling-bubble-010-1024x768

This is paint that has a dusty surface. Some oilbase and alkyd-base paints are designed to “chalk” when it rains. When this happens, a very fine powdery layer is removed, automatically cleaning the surface. In most cases, this is desirable. But if foundations, sidewalks, and shrubs become stained, too much chalking is occurring.

This is likely due to painting over a too-porous surface that has absorbed too much of the paint’s binding agents. A chemical imbalance in an inferior paint may also be the cause of excessive chalking. The best solution is to wash down the chalking surfaces as thoroughly as possible, then paint over them with a nonchalking paint.

Mildew      8F35F6AC-2091-453A-8B4A-BAD7DC4A1CE6

This moldy growth appears where dampness and shade prevail. And, if you paint over it, it’s likely to come right through the new paint. Use a fungicide such as chlorine bleach or a commercial solution to kill patches of mildew before repainting.

Running Sags

Using a paintbrush incorrectly (e.g., too much paint on the brush) can create a wavy, irregular surface. To correct it after the paint is dry, sand and repaint surface, smoothing out the new coat to an even thickness.

Paint Won’t Dry

This is perhaps the best reason to buy high-quality paint. Prolonged tackiness is an indication of inferior paint. If you apply poor-quality paint too thickly or during high humidity, it will stay tacky for a long time. Good paint, on the other hand, dries quickly. If you think you may have an inferior paint, first experiment on an inconspicuous portion of the house.

Think you’re ready to get started? If not contact paintway today for a free quote 🙂

paintway2019.au3.live-preview.net

Should I use Primer before I paint?


Using a primer before you paint is a great way to improve the quality of your paint job. You don’t need to prime your surface in all situations, but used properly, a primer can make all the difference.

When You Should Use a Primer?

Priming before you paint isn’t always necessary, although there are occasions when priming your surface can help you achieve a perfect, professional finish.

Here’s when you should prime before you paint:

  • Your walls are brand new. All new plasterboard needs to be sealed with a primer before it is painted.
  • If your existing paint job is dry and chalky. Paint becomes chalky as it begins to breakdown. In this case, you’ll need to wash the walls thoroughly, and apply a suitable primer to create a smooth surface for the new paint to adhere to.
  • If you are painting over oil based paint with acrylic paint. Acrylic paint won’t adhere properly to oil based paint unless an acrylic primer is used.
  • If you have mended cracks or holes. New plasterboard  should be sealed with a primer.If you walls are currently dark, and you want to paint them a light colour. The primer will help cover up the dark hue, so your new, light paint will show up brighter.

The Benefits of Using a Primer….

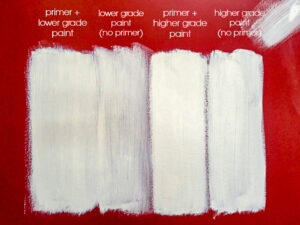
Painting a primer on your surface is a simple way to improve the finish of your paint job, and make it last longer. In most situations you can achieve better results with one coat of primer and one coat of paint, rather than two coats of paint.

Here are few benefits of priming your walls before you paint:

Priming will ensure your colour is rich and vibrant. Primers can hide the colour you are painting over – even dark reds and blues – so the old colour doesn’t alter the new colour.
Priming will create the ideal surface for paint to adhere to. While paints are rich in pigment, primers are rich in resin. This means paint can cling to primer more effectively than old paint. Primer also evens out your surface, so you can achieve a consistent finish.
Primers can prevent stains. Primers seal the surface, and therefore block out stains so they can’t ruin your paint job.
Primers can increase the longevity of your paint. Primers can help prevent peeling, cracking and blistering. They will also ensure the paint colour doesn’t fade.


What type of Paint Should You Use In Your Home?

close up of the paint brush and can with paint

When painting your home, using the right paint is important if you want the job to look professionally .There are many different kinds of paint: latex, oil based, semi-gloss, flat and chalkboard. Each of these has different meanings and uses. Do you know which paint goes on what surface? Here are some tips about getting it right.

Ceilings:
Ceilings are usually painted with a flat paint. You will see that there are many paints formulated specifically for ceilings. Painting ceilings can be problematic in that it can be hard to see where you have painted and where you still need to paint, so ceiling paints often have a tint to them that disappears when the paint dries. A flat finish is a good way to hide any irregularities in the surface and ceiling paint usually rolls on with very minimal splatter.

Woodwork:
Woodwork and trim is usually painted with a semi-gloss paint. It can be either a latex or oil based paint, but it has a sheen to it once it’s dry. If painting bare wood, you will have to prime it. Semi-gloss paint is easy to clean. You can also use a flat or satin finish, but only where woodwork will have very little wear and tear.

Walls:
Latex is a good choice for walls, and a satin finish is easiest to keep clean. The satin finish has a bit of a sheen, but it isn’t shiny or glossy. Latex paint can be easily applied with brush or roller and you should also prime any previously unpainted surface first.

Metal:
The type of paint you use on metal will depend on the type of metal. You can use latex or oil paint on iron or steel that has been primed first. If painting aluminum or galvanized metal you can paint latex directly without primer, but not oil based paint. That will still need primer first.
(cement, concrete block or brick): If painting masonry of any type, you will need to use an acrylic latex paint designed specifically for masonry.

Floors:
It is unusual to paint floors, but if you are, use a high gloss, acrylic floor enamel specifically designed for floors. This will stand up better to the abrasion of feet, shoes, pet nails and scrubbing.

Chalkboard paint was also mentioned above. This can be used on many surfaces, but also may need primer, depending on the surface.

If still in doubt Always best to leave it to a professional:

Visit us today