Christmas 2016

Have you completed your Christmas shopping? Paintway have been “wrapping up” (Pardon the Pun? hehe) all of our Christmas gift shopping over the past week, but I still have a few gifts left on my list. We have been so busy this month, it will feel great to have our shopping and gifts all set to go so we are ready to relax and enjoy time with family and friends.

Paintway would like to wish you all a very Merry Christmas, ?? and would like to take the opportunity to thank you all so much for your business in 2016. We are striving each year to be the best up to date professional Painters and Decorators in Australia. We have also managed to build a really awesome team who work really hard to ensure you home is the best that it can be.

Paintway Xmas


We would like to share one last tip for 2016 ?

Paint your home in neutral colours ?especially when you are mad Christmas people like us and love changing colours and themes every year, with decorating, and changing location of where the Christmas tree ?will be situated.

Dulux neutrals

Also, if you keep your colour palette to neutral colours it gives you loads of options to change your home decorating often, because the neutrals give you the rule to do so.

Christmas time is probably one time of the year where we get to see our family, and often all in the one place! So, giving your home a fresh coat of paint will make your home look a million dollars, and also allow you to change up some colours so when the table is decorated and the family has gathered…they can really admire all your decorating and as soon as the xmas decor gets packed away for another year, then we have a fresh palette to start again to decorate in the new year?


Signing off for another year….

Paintway will see you very soon in 2017. 


All of Your Painting Questions of 2016

paintwayquestions

With Paintway’s years of experience in professional paint contracting, we’ve heard every question imaginable, but quirky, off-the-wall queries aren’t all that common. Typically, homeowners who are considering professional painting services have the same basic concerns. To help those researching getting there house painting interior or exterior,  Paintway have put together this list of common questions and their answers.


Will there be minimal disruption?

If you hire a trustworthy, reputable painting contractor, the disruptions will be very minimal. A professional painter with established references can be left alone in your home during the day, so you can still work, run errands and so on. While the room that is being painted won’t be accessible to you during the process, the rest of your home should be quiet and undisturbed. Hiring a professional Painter  also means  less disruption. Paintway have a well established system for painting quickly, quietly and in the correct order for fastest results.

Will my furniture and carpet get paint on them?

Paintway WILL ALWAYS treat homes with respect and will work hard to ensure that everything in a room is protected. Protective coverings will be placed over carpeting and any furniture that can’t be removed from the room to ensure that everything stays tidy and free of paint. At the end of the project, any professional painter should handle all of the clean-up for you and remove any empty paint tins and other waste for you.

Are the fumes a problem for my family?

Oil-based interior paints can create fumes that contain VOCs, but if you prefer these not be used in your home, Paintway can oblige you. Even if oil-based paints are used, the dangers are minimal if the painter takes the proper precautions. Using fans and keeping the room properly ventilated greatly cuts down on any risk associated with oil-based paint fumes.

How long will the fumes remain for?

You can continue to run fans in the room for 1 to 2 days after the project ends to air the room out further. Most fumes will subside within 48 hours.

Picking Colours is so Confusing..Can you Help us Choose the Best Colour for the best Effect?

YES YES and YES! We are always more than happy to make that decision. With over 25 years experience, we have seen it all and really can help in adding Value to your home, or more importantly adding VALUE to the price of the property and giving the best advice to giving rooms are more larger feel!

Do you offer a Warranty?

We sure do!

Is Paintway Insured?

Absolutely!

If you have any further questions, feel free to contact us on (07) 4635 5549 or 0415 790 649


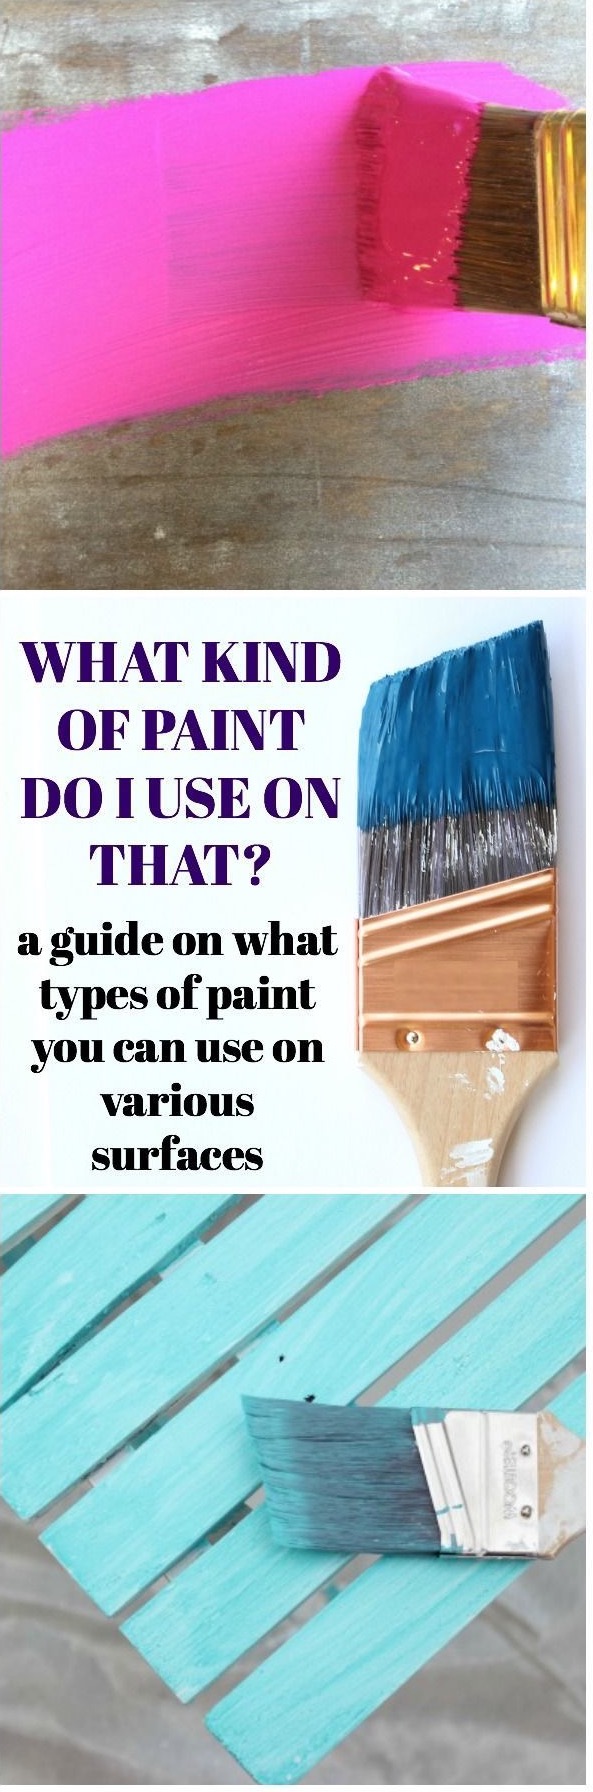
What kind of Paint Do I Use On That?


Paint and natural wood finishes are an effective way to protect and decorate surfaces. Here’s how to choose a product, use the right tools and pick the best application technique. Plan in what order you are going to tackle a painting project before you begin, and prepare the surfaces beforehand.

PAINT TYPES

Most paints fall into one of the general categories of eggshell, semi-gloss, flat or gloss. You may also need to apply primer or first coat, depending on the surface being painted. These basic paints will answer most of your needs but it is worth looking for formulas that will perform better in specific situations. Always apply paint as recommended by the manufacturer.

BASE COATS

For a decorative finish coat to last and look as good as possible, the right base coats are essential. For interiors, a combined primer-first coat is a good option.
Primer
Used on new, uncoated surfaces, primer protects the material beneath and provides a good base for further coats. Most paints can be sprayed with the right sprayer. Oil-based and water-based primers are available. Traditionalists prefer to use oil-based primer before oil-based paints, especially on exterior woodwork. Plaster  are usually primed with a coat of latex paint diluted with 10 percent water, known as a “mist coat,” although a stabilizing primer or solution may be needed if the surface is very flaky or powdery. Special primers for other surfaces such as tiles or melamine are also available, and can be over painted with normal paints.
First Coat
A specially formulated paint used to build up opacity beneath finish coats, one or two coats of first coat paint are usually required before the decorative finish coat is applied. Use pale first coat beneath pale finish coats and a dark first coat beneath dark finish coats. Although most oil-based first coat is suitable for interior or exterior use, exterior first coats are available that will last longer when exposed to the elements. Water-based paints are usually applied in as many coats as are required to provide an even coverage.

FINISH COATS

Once you have applied the base coats, or washed down previously painted surfaces and rinsed them thoroughly, you are ready to apply the decorative finish.
Flat
A latex-based, versatile paint type, flat is normally used for walls and ceilings. Many types of finish are available: dead-flat matt, matt, a water-based eggshell and silk. Some formulations contain vinyl to make them more hardwearing. Flat is also best used on siding materials. It can help the material cope with moisture. Exterior flat is available with a smooth or rough texture. Apply all flat using as many coats as are necessary for even coverage. For use in a sprayer, dilute flat with 10 percent water.
Eggshell
More durable than flat, eggshell has a slight sheen. Always check the exact finish because the degree of sheen varies between manufacturers. It is most commonly used on interior wood surfaces as an alternative to semi-gloss, although some manufacturers will specify that the paint may be used on exterior surfaces. Eggshell can also be used on wall surfaces where a hardwearing finish is required as it is easier to clean. Two coats will usually give an even color; use primer and first coat as required.
Gloss and Satin
A very hardwearing finishing paint, gloss is used mainly on wooden and metal surfaces. Satin is used in the same way as gloss but is slightly less shiny and is increasingly popular, especially for interior woodwork. Both solvent-based and latex-based versions of gloss and satin paints are available. Latex-based paints are easier to apply and less prone to “yellowing” with age, but do not provide as high a shine or hardwearing a finish as solvent-based paints. Almost all gloss and satin paints are suitable for interior or exterior use. Some glosses are formulated especially for exposed exterior surfaces. Gloss is generally applied as a single coat over one or two coats of primer.

WATER-BASED AND SOLVENT-BASED PAINTS

Paints are made up of pigment and a binder. Water-based (latex or acrylic) paints use water for a binder, solvent-based paints use mineral spirit, and some specialty paints use thinner. Natural wood finishes are also water- or oil-based. If you are using a mineral spirit- or thinner-based product (also sold as solvent-based) plan how you will dispose of excess paint. There are regulations.
More natural or eco-friendly alternatives to oil are available, and include alkyds. They are made of renewable materials such as plant oils, contain fewer preservatives, and their manufacture is less polluting.

SPECIALTY PAINTS

Good-quality paints will perform well in all domestic situations as long as they are used with the right primer and applied on the surface they were designed for. However, sometimes it can be worth using paint formulated for a specific task.
Bathroom or Kitchen Paints
These flats resist fungal growth and moisture better than standard formulations, although if you have condensation you should consider improving ventilation.
Floor Paint
Used on concrete and floorboards, floor paints are typically solvent-based and very hardwearing. Gloss or sheen finishes are available. New concrete floors should be left to cure completely before painting; check their progress with a moisture meter.
Metal Paint
High-gloss, smooth and textured (often hammered) metal paints are available. They can be used internally or externally; some types can be applied straight over rust. Thinner is generally required to clean brushes, rather than mineral spirit.
Traditional Paints
Products such as distemper and limewash, as well as ranges of traditional colors, can now be purchased relatively easily.

PAINTING A ROOM

New surfaces such as drywall or tongue-and-groove woodwork need an appropriate primer coat before first coats or finish coats are applied. When decorating previously painted surfaces, you will still need to apply first coats as well as finish coats. For information on applying natural wood finishes.
Woodwork
Prime bare wood with an alkyd paint, then paint it with two or more coats of eggshell, or one or two coats of a suitable shade of first coat and finish with a semi-gloss finish coat
Walls and Ceilings
These are usually painted with flat paint. Paint with a latex sealer. Use a mist coat to prime bare masonry walls and ceilings or apply good-quality flat directly onto the surface. Use eggshell for a hardwearing finish
Floors
If you want to paint the floor, use specially formulated, hardwearing floor paint

RECOMMENDED APPLICATION METHODS

Although latex- and oil-based paints can be applied with rollers or pads as well as brushes, cleaning them after using oil paints is difficult and will require lots of white spirit or thinner.
  • Primer: Use a brush, roller or pad.
  • First Coat: Use a brush, roller or pad.
  • Flat: Use a brush, roller, pad or sprayer.
  • Eggshell: Use a brush, roller or pad.
  • Gloss: Use a brush.
  • Floor Paint (on Wood): Use a brush.
  • Floor Paint (on Concrete): Use a brush or roller.
  • Metal Paint: Use a brush.

How to D.I.Y Ombre Walls..

Ombre has been in fashion for the hair….How about for your walls!

Here is how to achieve that look on your Walls:

Goodbye…old fashioned 1 colour feature walls…


ombre-wall

Ombre is a blending of colours to create a fading effect. When talking interior paints, it’s basically blending 2 or more colours on a wall. The ombre look starts with the lightest colour at the top, which blends into the medium value colour, which blends into the darkest hue at the bottom of the wall. It’s like horizontal stripes, but without the hard lines.


Ombre is best applied on a single accent wall. Colours that have less contrast blend more easily and create the best results.


Here’s how to do it:ombre-1

1. Tape off area to ombre. 


2. With a level and pencil, draw a line where you want the colours to fade into each other. You will be creating wide, horizontal stripes. 

ombre-collage

3. Roll out colours, stopping 7cm’s on each side of the level line, leaving 15cm between the two colours.

ombre-3-too

4. To create the blended effect, dip 10cm brush – half in one colour and half in the 2nd colour of the stripes you want to connect.

collage2-ombre

5. Brush back and forth blending the two colours – brush quickly, as paint dries fast!

ombre-6-6

6. Repeat for every 2 colours you want to blend.

7. Finishing touches! You may need to go back with a clean brush to touch up on either side of the blended area for any paint that got underneath the tape.

Tips:
Works best in 12cm sections at a time.
Use similar colours overall for easiest blending
Use colours with low contrast next to each other
And most importantly….Have fun!

Paintways 7 Simple Steps to Calculate the Amount of Paint Needed for your Painting Project


calculatepaint-jpeg


When wanting to repaint your home, there are a number of things to work out first before that brush ever touches the paint. Once you have found the perfect colour for your living room, the next step in the process is to find what the best paint to use is and how much you will need. Calculating the amount of paint you will need doesn’t have to be difficult, and Paintway’s guide  will be able to easily figure out how much you need.

1. Measure up your room

The first thing to do to determine how much paint you will need for your project is to measure all of the walls you want to paint. This is done with a simple calculation to help you quickly find the average amount of paint in litres for a single coat of paint. You will need to measure the surface area of your room, discounting the ceiling and the floor. To do this you should measure all of the walls in your home from ceiling to floor and wall to walls. Add the measurements of the width of your walls multiply them by the height of the room to determine the square metre size of your room.

2. Take into account windows and doors

When measuring the surface area of your room, you may not be painting the ceiling or the windows and the doors, so you need to determine the size of these surface areas and discount them from your calculation. With your square metre number, simply subtract roughly 1.85 square metres from your calculations for your doors, and perform the square metre measurement for your windows to find their size. Simply remove this number from your initial calculation to determine the surface area of your room.

3. Buying the right amount of paint

With your calculation determining the surface area of your room, you are now ready to purchase the right amount of paint – but wait there, it all still depends on how many coats you want to give the walls, as well as the viscosity and type of paint you want to use. On average, a 4 litre bucket of paint will allow you to paint roughly 32 square metres of wall for a single coat.

4. Number of coats
Whilst many people simply paint over the previous colour until it is no longer visible, the best painting services paint has to offer often like to add a primer coat in order to blank the previous pant, as well as paint a tint layer to bring the vibrant colours to life for a more professional look and feel. You will need to calculate how many coats you will need for each room, so test out your walls with a tester pot of the paint of your choice to see how it holds and finishes before purchasing more.

5. Finalising your calculations

When you have determined how many coats of paint you want to put on your walls, and the surface area of your rooms, you will need to divide the paintable surface area of your room by the square metre capacity of a 5 litre tub of paint. If your paint comes in smaller or larger sizes, use this number to determine how many tubs or tins of paint you will require to finish the job properly. If you find that you are short by a little, order a few small tins to make up the difference, but if you find that you will need more, then go for the extra big tub to make sure you can finish with a little spillage into the equation.

6. Using a paint calculator

Using an online paint calculator can be a simple way of quickly getting the amount of paint you will need for the room to be painted. Taking rough guesses is a good way to determine roughly the cost of your painting project, but getting the precise figure is the best way of making sure that you don’t go over budget, or come up short when that special paint you bought at a discount is no longer available.

7. Paint your walls

Painting your walls accordingly will be the best part of your final calculation and will make all of the hard work worth it in the end.

If you are in any doubt about the calculations and price involved in high quality paint, or the types of paint you will need for your particular rooms finishes, don’t hesitate to call Paintway, who will be able to talk you through the process, and give you a solid estimate on the final price for the job done.

How to Paint A Metal Surface?


When you’re renovating, the devil is in the detail. Taking the time to restore and protect your metalwork can add the perfect finishing touch to your home.

  1. Before you get started, you’ll need to prep your surface. Remove any rust, loose, flaking or peeling paint with a wire brush or coarse sandpaper.
  2. Next, clean the surface with A Brush Thinner to remove any grease, oils and dirt. Once clean, be sure to wipe the brush thinner off the surface with a cloth.
  3. With a clean metal surface ready to go, it’s time to prime. Different metal surfaces require different primers, so be sure to choose the right one.New or Painted Galvanised Iron or Zincalume: RFU Etch Primer

    All other New or Painted metal surfaces:  Metalshield All Surface Primer

    Steel, wrough iron and damaged galvanized iron under severe corrosive conditions: Metalshield Gold Galv Primer

  4. Once you’ve found the appropriate primer, stir it thoroughly with a broad, flat stirrer using a lifting action. Then load up your brush and apply a single, even coat.
  5. Once your primer is dry, it’s time to paint and protect your metal. To ensure your handy work is protected against rust, corrosion and the elements we recommend using Metalshield Premium Topcoat.
  6. Apply one clean, even coat and leave it to cure for 24 hours before applying a second coat. Wrap your brush or roller in cling wrap to prevent them drying out while you wait. Leave the final coat to dry for 3 hours before handling.for hard to reach or detailed projects, use a  Metalshield spraypaks. 
  7. New, bare steel, wrought iron and pre-painted surfaces don’t need to be primed. Simply give them a clean as above, and then paint with your chosen tint of Metalshield Epoxy Enamel.

We often get asked…”How is the cost of having our House Calculated?” Here is How:

Considering painting your own home?
Painting is one of the quickest and easiest ways to give your home’s interior a facelift — and it is one that can produce dramatic results as well. Unfortunately, many homeowners feel overwhelmed when tasked with choosing a lasting color scheme. To avoid getting stuck with a less-than-perfect color choice, they will spend hours studying the subtleties between Smokey Topaz and Roycroft Suede paint swatches, considering the mood they want to create (whimsical? relaxing? modern edge?), and deciding whether to trust their guts or hire an interior decorator to make sure things turn out just right.
Fortunately, interior painting doesn’t have to be that difficult. Most paint stores offer samples that you can take home for a wall test. With these samples, you can paint a few colors in large swaths on your wall to see the how the paint interacts with the room’s natural light. And you can compare it against design elements like pillows or furniture to see whether it will work with your overall decor as well.

On This Page:

  1. How Much Does It Cost to Paint a Room?
  2. Estimating Room Painting Costs
  3. Interior Painting Costs & Considerations
  4. How Much Does it Cost to Paint a Room Yourself?

Calculating Room Painting Costs

The cost to paint an average size room (10X12) ranges from $380, not including ceilings, trim or cost of the paint. DIY, this can cost between $200-$300. When estimating the cost, Paintway will start with how much paint will be required to complete the job. To know this, we first need to know the size of the area to be covered.
The easiest way to calculate the size of the paintable area is to add together the length of the wall and multiply it by the width of the room from floor to ceiling. The resulting amount is the room’s square footage. This total is a starting point, as it is not all paintable surface. Paintway won’t paint the windows and doors, for example, and they must account for ceiling trim and baseboards as well.
The next step is to subtract the area of the doors and windows — along with the square footage of the trim and baseboards — to get an average. Then, use the same calculation (length x width) on the windows, doors, trim and baseboards, and subtract all of those numbers. The result of this equation is the square footage of the room’s walls. This is your surface area number. We will typically add a little square footage back in to this amount to account for extra paint, which may be required.
Room Painting Cost Factors Here are some other cost factors to consider when it comes to the cost of painting a room:

Size of Room to be Painted

The size of the room to be painted is the most important factor in determining the cost of professional painting. It will take a paintway longer to cover a large room than a small room, and this means higher labor costs in addition to supplies and time. When estimating the paint for such a job, keep in mind that a litre of paint covers about 400 square feet (though the label claims it will cover 450 square feet). You will be charged for the number of paint cans needed, among other factors.

Textured Walls

A textured wall will need more paint than a smooth wall. The texture adds more surface area, even though it doesn’t increase square footage. Determining the additional surface area depends on how much texture there is. Paintway will probably estimate about 300 to 350 additional square feet of paint to account for texture. Factor additional surface area into your square footage calculations when seeking professional estimates.

Speed Factor

The speed with which a paintway can complete the job will determine its final cost, but time is difficult to estimate. Some painters have more experience and cover a wall faster, but some are more methodical and take more time. Most painters should be able to cover about 100 to 120 square feet of flat surface in an hour, unless they are working on a very large wall. Wood or plaster might reduce that amount to 80 to 100 square feet. You should also consider the time required for a first coat to dry before a second coat may be applied. This will add time as well — anywhere from one to 48 hours depending on the paint.

Multiple Rooms or Whole House

If you decide to paint multiple rooms in your home, choose colors that relate to one another without being completely the same — unless uniformity is your goal, of course. Costs may vary based on differences in color, gloss and room size. However, each room will flow depending on the trim’s color — which should all be white or neutral — so they look connected.

A whole-house color scheme presents the same cost factors as painting multiple rooms individually: colors you choose, the gloss, the size of the rooms and time/labor. You can choose to use the same color throughout your entire home to save on money, or you can use a color scheme with the same gloss throughout, though this isn’t recommended for selling purposes.

Interior House Painting Cost Factors

Average Paint Prices

Generally, it will take a minimum of two litres of paint to cover a room. At the highest end, paint will cost anywhere between $30 and $60 per litre and come in three different finishes: flat, semi-gloss or high-gloss. Flat finishes are the least shiny and are best suited for areas requiring frequent cleaning. Semi-gloss finishes are a bit shiny but can also be easily cleaned. A high-gloss finish is stain-resistant and easy to clean. Traditionally, living rooms should be painted with a flat finish to allow the paint to stand out. Glossy finishes should be reserved for hallways, and a semi-gloss is best suited for trim. Invest in pre-primed paint whenever possible. This cuts down on time by combining the layering process.

Almost any paint job will require a primer, which will cost anywhere from $7 to $15 per can. Primer helps the paint to stand out against the underlayer of paint it’s covering, especially if the new paint is lighter than the old coat. You will need at least two cans of primer, if not more, to cover one wall.

Supplies Needed

Paintway will typically provide most of the supplies for a project, but sometimes they will allow you to pay for solely labor if you provide all of the materials yourself. You might decide to do a DIY paint job down the road, in which case having these supplies on-hand will save you time and money. The supplies you should invest in include:

  • Brushes: Trim and sash brushes for intricate painting, beaver-tail handles on larger brushes for larger surfaces.
  • Tape: Standard painter’s tape to protect trim and ceilings from droplets.
  • Drop cloth: To protect floors and furniture from drips.
  • Paint tray: To keep out only a portion of paint rather than drying out an entire litre.
  • Paint rollers: A quick way to cover a large portion of a wall in paint.
  • Ladder: Necessary for reaching high areas (don’t use a chair!).
  • Small brushes: For touch-ups.

Additional Updates

Consider having your molding, trim and baseboards checked while you have a professional painter in your home. This might be a good time to upgrade or repair any cracks, warps or other issues. Paintway  usually touch up or replace these items for an affordable rate, and they may even package such fix-ups with your painting project.

Cost of Painting a Room as a DIY Project

A handy homeowner can buy paint and equipment for about $200 to $300. Don’t forget to factor in the time it will take you to do this yourself though. Depending on the size of the room and how much help you have, this could be a day project or a weekend project.

Here are the general steps to follow when painting a room on your own:

  1. Decide on a color palette: Earth tones and neutrals will cover up marks, scratches and hand prints.
  2. Buy supplies: You will need rollers, brushes and other supplies (see above) in addition to paint and primer.
  3. Remove furniture: Remove all furniture from the room to protect it from drips and avoid trips and falls.
  4. Clean the walls to be painted: Clean with a water and detergent mixture. For any stains, use trisodium phosphate.
  5. Remove outlet covers and switch plates: Remove but don’t paint the sockets or switches. Turn off electricity in the room to avoid an accidental shock.
  6. Outline: Put any painter’s tape over baseboards, trim and edging to avoid drips.
  7. Paint the first coat.
  8. Apply the second coat.
  9. Touch up: Touch up baseboards and ceiling trim as needed. Also touch up any spots on the wall.

Contact us Today for a free quote ; paintway2019.au3.live-preview.net

Do you have a problem with flaky or cracked ceilings? Read on…..

cracked ceilings

Problem Ceilings? (Peeling and Flaking Paint)

The most common problem area when it comes to painting is the ceiling. Especially in Bathrooms because of Moisture! Or where we are based here in Toowoomba in the Mountains there can be months of high moisture from being in the Clouds.


There are several problems that can occur on a ceiling to categorise it as a problem area:

Calcimine Paint

Fibros plaster ceilings were originally being painted with calcimine paint.  Calcimine paint came in powdered form.  It was mixed with water then applied to the ceiling.  Once it dried by the water evaporating it left a coat of pigment powder on the surface of the ceiling.  Years later the ceiling would have been recoated using a flat plastic paint which resulted in the calcimine pigments and powders sucking all the binders out of the new plastic paint making them unstable.  Over the years with extra coats being applied to the surface creating extra pressure as well as gravity doing its job causes the paint to flake.

Incorrect application

In the early 80s where gyprock homes were being built to price and with little knowledge of paints the incorrect application was being used.  Painters were applying flat paints straight onto bare gyprock and therefore, the paint was not soaking in like a primer would usually do.  This application process becomes unstable over the years as well as more coats being applied over time creating more pressure on the surface and gravity doing its job the result is a problem ceiling which peels and flakes.

Moisture

One of the more common issues with problem ceilings is moisture.  There are several reasons why moisture occurs.  Moisture from storm damage can release the coating from any ceiling surface causing peeling or blistering paint.  Also wet areas in the house such as the kitchen, laundry and bathroom can create moisture. For example in a bathroom with lack of ventilation, steam damage can occur to the coating causing it to flake and peel.  Using paint with a higher sheen level may help reduce water absorption which accelerates peeling ceilings.

Style of home

Queensland style homes most commonly have VJ timber ceilings.  When flaking occurs on these types of ceilings it is usually due to new acrylic paint being applied over old enamel paint.  This occurs because acrylic paint is flexible by nature and the enamel coating is rigid.  Therefore over time due to changes in temperature  the different paint properties work against each other resulting in the top layer delaminating. To solve this issue the acrylic coating needs to be completely removed followed by using a general purpose undercoat to stabilise the surface before recoating.

The common theme in the above reasons for problem ceilings is PREPARATION, wrong application and the ceilings history.  Due to these reasons it is hard for the painting of a ceiling to be done at time.  However, no matter how much preparation occurs if the history of the ceiling is problematic it is difficult to treat with a simple paint application.

Movement happens with all homes every 10 years or so…causing joins and cracks to also appear.


Call us today for a free ceiling assessment here:


Does your home tell a story?

WARM – COOL

Look around the rooms in your home and you’ll probably pick up on a theme (or two). Perhaps you’re gazing out at a sea of blues and greens—or a spectrum of sunset shades. Paint colour is an expression of your personality,We branch out occasionally, but most of us have a proclivity for certain types of shades. Read on to discover the meaning behind your favourites and tips for creating looks everyone can live with.

If You Gravitate to Soft, Warm Shades…༆Associated with sunshine and roaring fires, yellow and orange (and close cousins peach and pink) have a cheerful, welcoming personality. And most likely, so do you. People who use warm tones tend to be friendly and nurturing—they love having others over, The fuzzy feeling we get from these colours isn’t just symbolic. Because of their brightness, warm shades appear to spring forward, literally making a room feel more intimate; cool hues, on the other hand, seem to recede, expanding a space.

The luminous quality of the colours is also energising, stimulating conversation and appetites, Still, to some, warm can be cloying:


If You Gravitate to Soft, Cool Hues…༆Most reactions to colour come about because of what’s around us in nature, So there are certain universal truths. In studies, people tend to associate pale to medium blues, lavenders, and greens with the sky, a body of water or wide-open field—elements we perceive as being tranquil and soothing. And because mild, cool shades have a lower intensity than warm or bright ones, they are literally easier on the eyes.

If you are drawn to blues and their brethren, you probably view your home as an oasis of calm in a hectic world. You may also be a bit of an introvert.  To prevent watery shades from feeling chilly, paintway suggests balancing them with hints of yellow, orange, or brown in your furniture and accessories.


If You Gravitate to Jewel Tones…༆Colours that seem plucked from the red carpet  night—ruby, emerald, sapphire, amethyst, topaz—lend instant va-va-voom. Like the celebrities who turn heads in those hues, you are probably outgoing, confident and creative. People who choose these colours want to feel inspired by their environments; they thrive on the stimulation,The brilliant, concentrated colours are wonderful at minimising flaws: They can make a room without much architectural interest feel glamorous, create intimacy in an imposing space and play up the coziness in a small room.

If you paint a tiny bathroom navy blue, it will seem dark and confining, but sapphire has a dynamic, enveloping effect—it has to do with the brightness of the colour.To keep things feeling cohesive, not chaotic, pair jewel tones with neutrals or colours that have a similar intensity. Love the shades but wary of using them all over? Paintway suggests starting in places where you don’t spend a ton of time, such as a hallway, powder room, or dining room.


If You Gravitate to Neutrals…༆Like rocks along the coast or monuments of marble or granite, gray, brown, beige, and ivory have a feeling of permanence and a crisp, classic look. If this appeals to you, you are probably even-keeled and practical, and not interested in re-painting your rooms every few years because you’ve tired of the shades, You may also be in on a trade secret: Earthy walls allow you to use more colour in your accessories and furnishings. It’s really smart if you’re a colour person to do a neutral backdrop and let your bright art and objects shine.

How to Save Money on Painting Your House $$$$$$$$

save-money-on-exterior-painting

People start exterior and interior home painting projects for many reasons – to beautify and extend lives of their houses, to improve curb appeal, or to raise value of a house in order to sell it faster.

But whatever the reason, the following home painting tips will help you save money on your next home improvement painting project.

Repaint your home more often

This may sound counter-intuitive, but with regular maintenance painting you can keep the surfaces protected and avoid costly repairs.

A lot of homeowners wait too long before scheduling exterior home painting, thinking they are saving some money, but instead they end up with failing/peeling paint, cracks, dryrot, mold/mildew and water damage – conditions that are very expensive to fix. It’s like being penny wise and dollar dumb.

Besides, if you take into account that the biggest costs of any housepainting job come from labor, you will realize that the longer you wait, the more you’ll end up paying because of all the scraping, sanding,priming and repairs that your house will need.

It’s much cheaper to keep your house and your budget under control by being proactive – a properly and regularly maintained house usually needs just one fresh coat of paint and minimum surface preparation – your savings will reach into thousands.

Choose the best

“I am not rich enough to buy cheap things” – this saying holds true for so many things in life, but especially for house painting.

The primary purpose of quality paint is to protect your home from the elements, and its decorative value is just a nice bonus. So when you buy cheap paint, you are not saving any money, just the opposite – you are wasting it, because the thing you bought does not do what you bought it to do.

The same goes for getting quotes for painting – low bidders cut corners on surface preparation, and without proper surface prep the paint will not hold well – you may have to pay someone else to redo the job. You can avoid paying more and paying twice if you choose a reputable house painting contractor who will do the job right the first time.

Some people spread their exterior and interior home painting projects throughout the year – they hire a house painter just for painting a room, then a couple months later they call him back to paint something else in the house and so on.

But if you group your exterior and interior home painting projects together to be done at the same time, you can usually get a “volume” discount from your house painting contractor – he will save  on setting up and wrapping up and will pass those savings on to you.


painting-a-houseContact us today for a free quote: paintway2019.au3.live-preview.net