Happy Easter 🐣

A Quick Tip 📌

In Life Without Preparation..things don’t usually work out…or work out the way we would like?

The same applies applies to Painting someones home?. The preparation is often more important than the painting itself.

We are always advocating that when looking for a housepainter, DON’T  always assume that they are going to “PREPARE” your home the correct way…generally..(especially on a cheap quote)  they are going to cut corners to save cost.

The area’s must be assessed properly so the right products can be used on the application, because if it is not done with care…you can bet your bottom dollar that the paint is going to show signs of issue’s over time…like cracking and peeling and colour just not holding to the surface!

HAPPY EASTER EVERYONE!

How to choose the Right Colours for your home

What’s the most important role colour plays in a room?

It sets the mood for a room. The colour you choose is really about what you want the room to feel like.

Do you tend to use one colour throughout the entire interior, or mix it up room to room?

In general, I feel it’s important to have continuity throughout the entire house. I’ll use one or two colours throughout the house, and then mix in other accent colours. That gives continuity, but at the same time allows the various rooms to         have different personalities.

What kind of classic colour combinations do you think work best?

Blue and white, yellow and green for a kitchen, red and black for a very formal dining room. For a lounge, I would suggest chocolate brown and camel or dark green and navy blue. We like burgundy and khaki, navy and khaki, or dark green and khaki. And greys and blues look really great together.

What kind of guidelines would you suggest if someone wants to use bold colours?

You need to be aware that you will likely get tired of bold colours very quickly. If you really want to incorporate a strong, bold colour, use it as an accent. Bold colours are often attractive because they are the colour of the moment this can quickly date a room.

How should the homeowner account for different lighting in choosing colours?

Select three shades of the colour you want: where you think you want to be, and one shade lighter and one shade darker. Do this with paint, wallpaper, or fabric swatches. Put the samples in two places: next to the window and in a darker corner. Look at them at different times during the day and at night. Then make your decision.

Is a neutral colour scheme always appropriate?

No. It totally depends on the house, the location, the architecture, and the personality of the homeowner. It’s about trying to keep a balance. An entire neutral house can be boring.

How do you use colour to affect relationship and the relationship with other decorative elements?

Colour is key to how the decor is perceived. If it’s a big room, paint it a brighter, warmer colour to bring the walls in. Paint a smaller room a cooler colour to push the walls out. Colour also establishes visual weight and balance. If you put a bold primary-based piece of art in a pastel room, it’s probably not going to seem right. The colours of the art should balance the colours of the space.

What are the challenges homeowners face in choosing colours and colour schemes?

Sometimes people are scared of colour, especially dark colours. Ultimately, people should really follow their heart: If they love a colour, test it, and like it in place, they should not be afraid to choose it.

Spraying-Rolling- or a paintbrush? Which method and why?

We just wanted to touch base and talk to you about methods of painting your home. We had a customer call us recently and was quite distressed the painters she had hired and sprayed EVERY wall, corner and every inch of her home which cause alot of excessive spray to lay over her carpet furniture including the TV!

Using a paint spray has become a useful tool in the housepainting trade, there certainly is a place for spraying but it certainly IS NOT everywhere internally in your home!

Often painters will use this method to save time and money but there has to be precautions in doing so as paint that is sprayed can leave a fine residue over everything in that room!

When spraying very special care and preparation needs to happen before we can use the machine and often this is overlooked by many tradesman.

If you decide to paint a room yourself using a Spray…here are some helpful tips to get started 😀

Preparation of surfaces (standard room)

• Remove any grease or dirt by washing down surfaces

• Fill any imperfections in the plaster work with a recommended filler product

• Lightly sand any filled areas and imperfections to a smooth, even finish

• Wipe down surfaces with a soft broom/brush or cloth to remove any dust

• We recommend you also protect yourself by wearing protective clothing and safety equipment such as, eyewear, gloves and a mask.

Masking

• Use a blue tape to mask up all trim areas including; architraves, skirting boards, window reveals, light fittings, light switches, etc.

• Cover all floors and furniture with heavy duty Wagner canvas drop cloths

• It is best to remove any window furnishings, however if this is not possible then cover with lightweight plastic drop sheets or masking film

Spraying (ceiling)

• Select a premium paint in your chosen colour. Firstly, apply one coat to all cornices

• Then work systematically from side to side across the width of the room, applying the first coat to the ceiling

• Allow the first coat to dry thoroughly and then repeat the process with a second coat moving up and down the length of the room

Spraying (walls)

• After the ceiling is completely dry, mask up underneath the cornice edge using blue tape and masking film or paper and extend to cover the pre-painted ceiling to a minimum of 30cm

• Working systematically up and down, across the wall, apply the first coat in an even pattern

• Allow the first coat to dry thoroughly and then repeat the process with a second coat

Removal of masking tape/paper

• Allow the paint to dry thoroughly before gently removing the masking tape

• Note – if the paint is still wet when removing the tape then the paint may bleed onto the protected surface

• Dispose of all tape, paper or plastic thoughtfully

 Cleaning

– Once you have completed the project, it is important to follow the simple cleaning instructions for  sprayer to ensure maximum performance of the unit for your next project.

Happy New Year 2022!

We hope you had a wonderful start to 2022! It certainly is renovation hysteria at the moment. We have seen unprecedented times for renovating and updating our homes! Painting is certainly the best place to start! Changing colour can bring a whole new look to start the New Year!

We finally had some time to do a bit of Painting and touch up around our home which desperately needed doing, which included changing our doors to a crispy white with silver modern handles.

We are booking heavily already into this year – Contact us today if you are thinking about giving your home the love it deserves.

If you are thinking about SELLING – we would love the opportunity to come and give your home a free Appraisal – NOW is the time to sell if you have been thinking about downsizing or upsizing or moving on!

Undercoat and Primer…What are they and why are they so important?

Undercoat and Primer are key components in the Painting process. It is  imperative that they are done and must be considered when painting your home.

Whether your painting a small internal or a large external project, understanding how to use Undercoat and Primer will influence the finish of your project dramatically.

Paintway give you a a brief run down on what Undercoat and Primer are and how to use both materials in your next painting project.

A primer  or undercoat is a preparatory coating put on materials before painting. Priming ensures better adhesion of paint to the surface, increases paint durability, and provides additional protection for the material being painted.

Prepcoats prepare the surface to be painted with a topcoat. Primers, on the other hand, adhere to timber surfaces and contain stain inhibiting tannin blockers, while an undercoat is ideal for preparing plasterboard.

Acrylic Primer: used to seal bare areas before painting the finish coats. For example bare plasterboard walls or ceilings.

Oil Primer/Undercoat: used as a binding coat between glossy surfaces such as windows, doors, frames and skirting and your finish coats. Most paint jobs older than 4 years would generally have been painted in enamel paints. For example repainting Enamel surfaces or bare hardwood.

Water based Undercoats: there are a few manufacturers that make a water based undercoat. Its best to talk to them and doing a test sample to check if it sticks. The key to these water based products sticking to enamel, is thorough preparation.

Note: if you want to check if you have enamel surfaces – get some methylated spirits and use a old rag and rub done the area to be tested. If the paint comes off its acrylic – if not its enamel. Be careful not to mistake paint rubbing off with old dirt.

If already have enamel painted surfaces and you have used the appropriate primer or undercoat you now have the option to convert from enamel to water based top-coat. The advantages are they are less smelly (low odour) and easier clean up paint – they are usually referred to as Acrylic Enamel. Not only are they easy to use you can wash up in water.

Queenslanders in Toowoomba

The best things about an old Queenslander House is the charm.  There are some design elements that characterise these homes and make them beautiful, but there are also some design elements that make painting it tricky.

It’s not enough to just slap some paint on it and hope for the best.  There are a few things to consider that will turn an old Queenslander looking like a stylish and vibrant house on the street.

The first thing to consider when painting your house

The older buildings were built with different materials when compared to modern buildings.  This must be taken into consideration before painting.

A lot of the old Queenslanders have strips of timber known as VJ panelling. When painting these walls of an old house, the first step is to go through and wash the walls down.

Preparing to paint your house

Over time an older house will bear the brunt of weather and lifestyle. This just means it needs to be thoroughly inspected to identify what we need to do.

We inspect for any defects, such as dints, chips in the walls, nails that might be hanging out that need to be knocked in.

Once we are happy with that, we sand any surfaces that need paint to ensure we are following correct procedures.

Helping the paint last longer on your house

The old Queenslanders were built with VJ panels, which means there are gaps that need to be filled.

This part of the process can be quite a time-consuming process and can get quite messy. It’s important that professionals come in and treat it right and use the right products.

To prepare for painting VJ panels, we use a Poly Gap Filler. It’s quite flexible and great to work with.

Timber is always moving. So it’s important to have a product that is going to flex with that to avoid the paint cracking open.

The final result of painting a Queenslander

Old Queenslander Houses in their own right look great.  But with a good paint job, they really pop on the street.

By understanding the specific steps required to enhance a Queenslander house, you can rest assured that your investment will last 10 – 15 years.

The Best way to colour match your walls

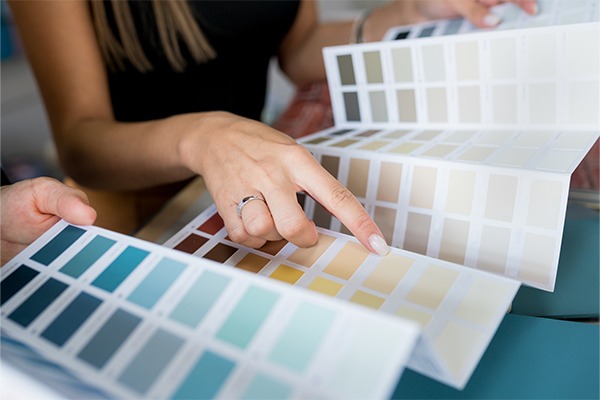
Deciding on a colour palette for a room can seem like a daunting task. Anyone who has undertaken it can relate to the experience of standing in front of a colour wall overwhelmed with choice – then leaving to realise the colour chips selected look very different when out of the florescent store lighting. Whether you are designing a space for a client, or trying to match an existing colour, here’s how to help ease your colour swatch pains with our colour swatching tips and tricks.

Come up with a plan

First things first, narrow down your colour short list before going to get your swatches. Having a plan will help reduce any confusion at the store. If you know the rough colour you want and just need to decide on the shade, start by considering how much natural light the space has, as this will help dictate the perfect shade for your room.

Take options

Give yourself some breathing space with a variety of shades, so you can nail your choice on your first trip to your local paint shop. This is especially helpful when you know which colour you want but are narrowing down the shade and tone. Visualising the different swatches against your wall will help streamline the decision process.

Create your own colour

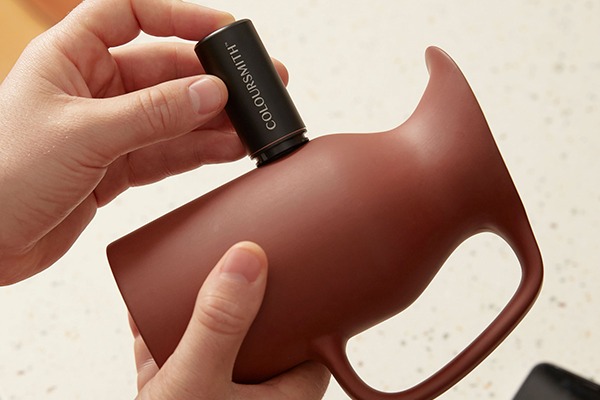
Have a colour in mind but can’t seem to find an exact match? Whether you have found the perfect colour in a painting, coffee mug or a cushion, take that colour into your local paint shop to do a colour match.

Colour swatches in any light

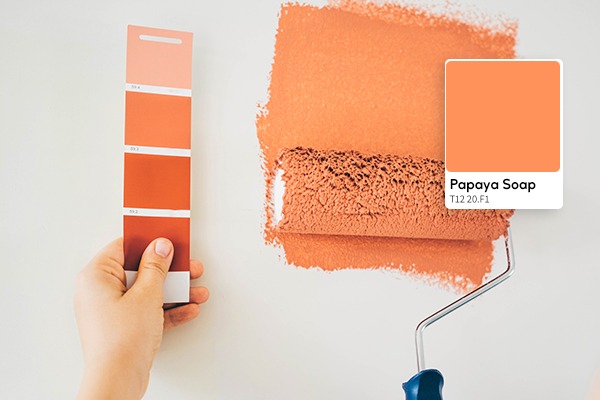
Struggling to see how a swatch will look in different lighting? Use the test pot to see for yourself how a colour will dry and look in your space’s lighting. If you don’t want to swatch directly onto your desired wall, you can paint on a piece of white paper. Trying out colours in your space at different times of the day and night will ensure you like the colour you are considering in all lights.

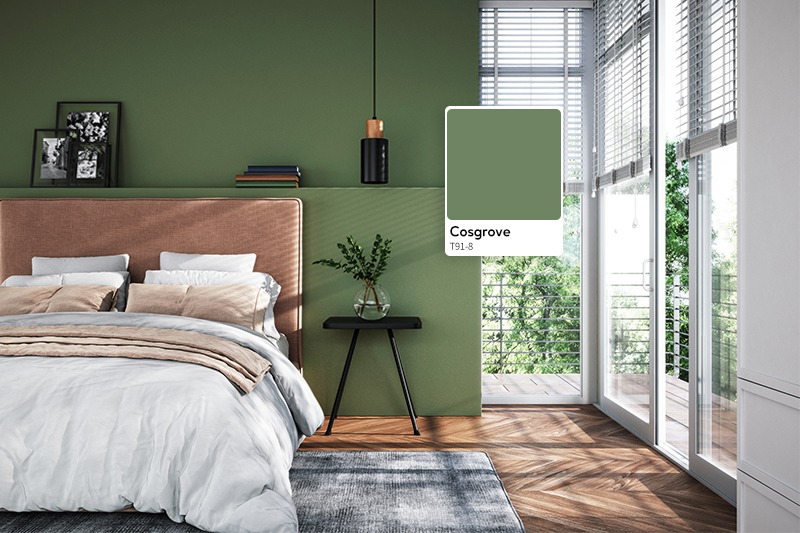
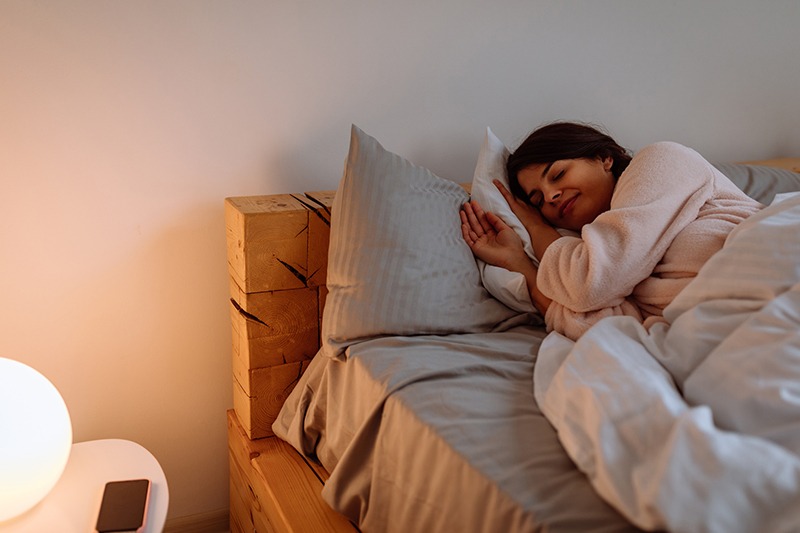
Soothing Colours for a good night sleep

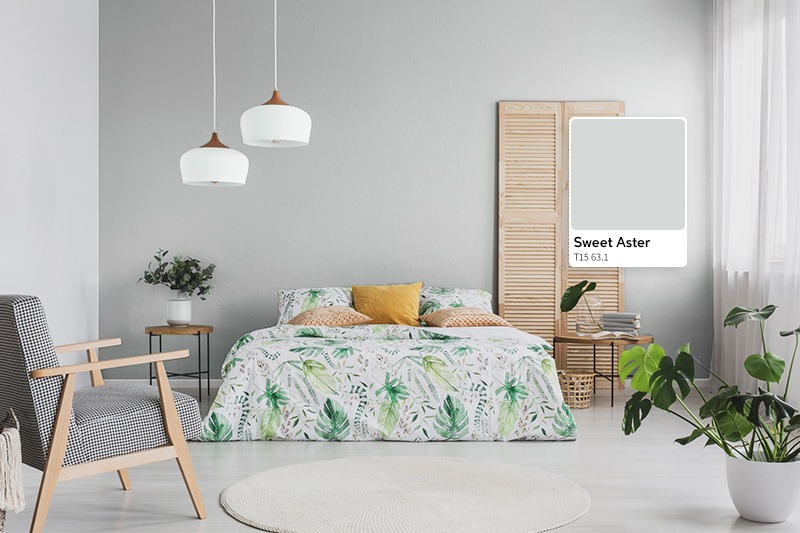
Sleep is a critical factor in maintaining our physical and mental well-being, so trying to optimise our sleeping environment is always a good idea. When designing the look and feel of your bedroom, you may jump at certain colours and shades based purely on their aesthetic appeal. While there is zero shame in doing this, if you are someone who struggles with getting to sleep, some colours can help you relax.

Don’t have time to study colour psychology in depth? Don’t worry because here’s a quick guide to which colours to use for your best night’s sleep.

Blue

The best colour you can use for your bedroom is blue. A range of studies has listed blue as the most calming colour due to its soothing effects on your heart rate and blood pressure. How does blue do this? Our eyes contain specialised receptors called ganglion cells that are most sensitive to the colour blue. These cells filter and send information to the part of our brain that controls your body’s 24-hour rhythm. A recent study of 2000 Travelodge hotels found that guests who woke up in blue rooms got the highest amount of uninterrupted sleep, compared to other colours at 7 hours and 52 minutes. This is impressive considering the average person rarely gets 7 hours of uninterrupted sleep.

While all shades of blue can evoke a relaxing mood, if you want to give the appearance of a larger room, opt for lighter shades on your bedroom walls and ceilings. We recommend colours like Taubmans’ Dim Night or Formosa Blue.

Green

If getting out into nature relaxes you, why not incorporate nature’s tranquility into your bedroom colour palette? Creating a space that mimics nature is a sure way to tuck in and soothe yourself to sleep. Fresh greens are known to bring harmony to the room.

Avoid glossy paint

The sheen of your paint will play a major factor in terms of sleep quality – no matter which colour you choose. Anything that can reflect light and stimulate your sense will be a detriment to your sleep quality. An overly glossy finish can reflect light and stimulate your brain, so opt for a matte or low sheen finish instead.

Colour to avoid in the bedroom

As a rule of thumb, vibrant colours such as reds, oranges and loud pinks should be avoided in bedrooms. This is due to these energetic colours being stimulating to the eye. Some studies have shown that looking at the colour red increases your heart rate and adrenaline flow. In the wild, reds, oranges and yellows are considered dangerous colours and instinctually make us more alert when we see them – the last thing you want when you’re winding down for sleep. If you simply must have a vibrant colour, consider a more muted version.

If you’re trying to give yourself the best chance at a good night’s sleep, make sure you create a soothing retreat that isn’t overly stimulating to the eye. To create this sleep time oasis, seek out the relaxing blues, greens and matte finishes. Get creative and happy painting!

Painting Old Queenslanders

At Paintway we get asked Daily to quote on old Queenslanders that are in desperate need of TLC.

Many homebuyers buy these charming houses with lots of characteristics and start the journey to restore them.

Owners are often shocked at the time and costs in taking on the task of repainting these old charmers.

The traditional Queenslander home is well suited to the Queensland environment not to mention its elegance, class and heritage.  However, when it comes to maintaining this type of property there are many hidden areas which are unknown to the common eye.  Given the amount of jobs we do on Queenslanders we thought it essential to share some very common issues which arise onsite costing our clients unnecessary money and time.  If you take note of the following points before organising any repair work, especially painting, on your Queenslander it will help ensure your renovation or maintenance work is done to the best possible standard

Easing windows – before painting most Queenslanders have windows that stick or are painted shut or even left closed because it is too hard to open or close these style of windows over time creating a big security problem. We recommend calling in a carpenter to ease all windows prior to painting to ensure they can easily be opened and closed once the painting has been finished.

Rotting timber replaced – It is essential to have a carpenter or someone with a bit of knowledge of rotting timber assess the property for rot before we start painting.  This saves time and money.  We have worked on many jobs where this step hasn’t been taken prior to painting and instead we notify the client of the problem timber which results in wasted time and money especially when some timber needs replacing after the preparation for painting has begun. Some rot needs to be dug out and left to dry which requires time.

Don’t leave the weather boards deteriorate before your next paint job – If you maintain your paint job the better result and the more cost effective your next painting project will be.  The longer you leave weather boards with flaking paint the more expensive it is to get them back to a reasonable condition and sometimes you may never be able to get them back to a good condition which will depreciate your property’s price potential.

Regular House Washing – Paintway highly recommend having your house washed once a year.  This ensures the exterior painting is maintained to the best of its ability and minimises issues that a build up of grime and dirt create. Not to mention it has your home looking clean and new!

When a Queenslander is painted it truely transforms the property given the detail and attention this type of property requires when a paint job is done.  However, if the windows are left too long between easing, the weatherboards are rotting and the paint job has deteriorated then the property’s true potential will never be reclaimed.  Before booking your next paint job on your Queenslander be sure to do the above items and we can ensure your property will look amazing.

House Painters in Toowoomba

If you’re looking for a painting company, chances are you’ll have a lot of questions to ask. At Paintway our entire business wants you to be comfortable asking any question that may arise. That’s why we put together some of our most commonly asked questions for you!

What type of paint do you use and why?

We primarily use quality products from Wattyl and Dulux. If there is another brand that you are interested in using, let us know!

Do you still use oil based paints and what is the primary difference between oil and water-based (acrylic, latex) paints?

Oil-based paints have been mostly removed from the market for architectural applications. This is due to the constant push for less solvent and lower VOC (Volatile Organic Compounds) in the paint formulas. Oil-based paints redeeming qualities include a superior smooth look, good moisture resistance, and ultimate hardness and durability. Unfortunately, because of the curing process, oil-based paints tend to become very brittle as they age, which leads to cracking, peeling, and ultimate failure of the paint. On exteriors and moisture prone areas on interiors, oil-based paints have a tendency to mildew, because some of the ingredients act as a food source for mildew.
Water-based paints, also known as latex and acrylic paints (these are the ingredients that “bind” the paint to the surface), have come so far and have outperformed their counterparts of yesteryear. Today’s latex and acrylic paints exhibit excellent qualities, such as moisture resistance, mildew resistance, flexibility, colour fastness, and block resistance (the ability to not stick to itself or objects to stick to the finish, such as items on a painted shelf). Most of the water based paints we use are known as 100% acrylic, which are of the highest quality available.


What are the different kinds of paint finishes and how do I select them for each room?

Paint finish comes in three general categories:
Flat Finish– also known as matte finish
Satin Finish – also known as eggshell finish or low-luster finish
Gloss Finish – also known as semi-gloss finish Read where the best places to use these types of finishes are in your home.

Can you offer advice on how to choose a colour?

Lighting, architecture, and room decor are three environmental factors to consider when choosing a paint colour. An ideal paint colour is one that considers the all three elements and provides balance and unity to the space.What if I don’t like the colour selected, can I change it?

Would it be an additional cost? Yes, it is ultimately the homeowner’s responsibility for any colour choices, and there is an additional cost for a colour change. The additional cost is determined by how much of the job is completed, along with the cost of the additional paint.

What is Faux Finish?

It is a decorative painting technique. Faux is a French word meaning false. This painting technique is a way to replicate materials such as marble and wood with paint. There are many forms of decorative paint finishes used for walls and furniture, which include: marbleising, wood graining, Venetian plaster, colour wash, striping or streaking, and rag painting.

What is the benefit of working with you?

Customer Service. Our success has been based on delivering high quality painting services with exceptional customer service. We stand behind our work and will work with you to make sure you are happy with the experience and the finished product.

How do I prepare my rooms for your visit?

You will need to remove any small items from the tops of shelves and pictures from your wall. We can move the larger items towards the centre of the room and properly cover and protect furniture/items.
How much will this painting job disrupt my home?

Disruption is kept to a minimum. At the end of each day our crews will clean the areas we are working in and move tools.

My room is wallpapered now. How will you handle that

We will remove wallpaper prior to painting. Before we remove the paper we will test an area to see how the paper was applied. If the wallpaper was not applied properly it may lead to damage to the walls when the paper is removed

Can you provide references?

Yes, we can! We can give you a recent customer to call or have you look at our report cards that customers fill out at the end of each job. We also have excellent 5 star online reviews posted on our website and on, Google+